Sunday, November 3, 2013

rainbow butter cupcake


The traditional butter cake is best made using an electric whisk. When I use a hand whisk or I use the creaming method, the cake does not turn out the way MIL likes it. She is a butter cake lover and she can tell a good butter cake from a second grade one.


When Princess Chickadee and I baked these butter cupcakes, I was not looking forward to a massive cleanup after the baking session (especially knowing that there would be several bowls of coloured batter to wash) and as such, I decided to have the cupcake batter prepared using the creaming method.


Well, I am happy to say that the cupcake turned out moist. Do excuse the "dinosaur shape" (as my colleague called it when she saw the photograph above). I let Princess Chickadee do the baking (and I merely supervised) and I guess she was a little overly enthusiastic with the batter that she scooped into the muffin case.


I would say that the "hardest" part perhaps would be the creaming of the butter and sugar because you do need to exert a bit of strength. For creaming, I find that my trusty wooden spatula is most suitable.


As you can see from the above, when you let a toddler have free reign with the design, you get a lovely kaleidescope of colours without care as to uniformity of each coloured batter. That's how toddlers view the world - easygoing and carefree.


And look at the lovely end result that you see in the photograph above. Such a lovely cupcake! A word of caution, though. The batter rises quite a bit. As such, do resist the temptation to fill the muffin case to almost full as the batter would rise above the edge of the muffin case, resulting in the mushroom shape of the cupcake.


INGREDIENTS

225g butter (softened)
1 1/2 cups castor sugar
4 eggs
2 1/2 cups self-raising flour
1/8 tsp ground cinnamon
1 tsp vanilla essence
1 cup low fat milk
assorted food dye of your choice


METHOD

1. Preheat the oven to 180 degrees celsius.

2. Line the muffin pan with paper cases. Set aside.

3. Sift the self-raising flour and ground cinnamon in a bowl. Set aside.

4. Cream the butter and sugar in a mixing bowl using a wooden spatula until well mixed. Add the eggs, one at a time, mixing well with each addition. Add the vanilla essence and mix well.

5. Add the milk alternately to the creamed mixture with the flour mixture, ending with the flour mixture.

6. Separate the batter into several small bowls. Add food dye to each bowl and mix well.

7. Drop by spoonfuls onto the prepared pan, aiming for the centre of the muffin case with each drop. Fill the muffin case until it is about half full.

8. Bake for 20 minutes or until a skewer inserted in the middle of the cupcake comes out clean.

9. Let the cupcakes cool in the muffin pan for about 5 minutes before transferring them onto a wire rack to cool thoroughly. 


baked omelette


How easy is this recipe?  As easy as 1-2-3.  Yes, only 3 ingredients and simple steps.... so simple that after I baked the first batch (see photograph above), Princess Chickadee baked the second batch (see photograph below) from start to finish.


INGREDIENTS

1 egg
2 tsp mayonnaise
2 tsp self-raising flour


METHOD

1. Preheat the oven to 180 degrees celsius.

2. Grease a small baking pan and set aside.

3. Whisk the egg using a hand whisk until frothy.

4. Add the mayonnaise and whisk again.

5. Stir in the self-raising flour.

6. Pour into the prepared pan and bake for 10 minutes.


TIPS

1. The amount of mayonnaise is up to one's tastebuds.  As the baked omelette is intended to be consumed by toddlers, I did not want to add too much mayonnaise.

2. Do not over-stir the flour else the omelette may turn out harder.

Monday, October 28, 2013

vegan chocolate cake


When I obtained this recipe from the internet, the person who uploaded the recipe touted this to be the best vegan chocolate cake recipe in the world.


My feedback after following the recipe exactly previously:-
(a) the cake was a tad too sweet for my tastebuds.  In fact, MIL (who is diabetic) commented that the cake is sweet.  When she says something is sweet, it means it is really sweet because she has extreme tastebuds (eg. she will add soya sauce to an already salty dish). 
(b) The cake did not rise enough for my liking.


I decided to tweak the recipe. 


After some modification, I am pleased with the end result.  The cake is moist, not overly sweet (but then again, the level of sweetness is ultimately dependant on one's tastebuds, isn't it?) and it rose more.  Is there room for further improvement?  Sure there is.  In life, we always aim to better ourselves.  But one day at a time....


INGREDIENTS

1 1/4 cups self raising flour
1 tsp baking powder
1/2 cup castor sugar
1/3 cup cocoa powder
1/2 tsp salt
1 cup warm water
1 tsp vanilla essence
1/3 cup vegetable oil
1 tsp apple cider vinegar


METHOD

1. Preheat oven to 180 degrees celsius.

2. Grease and flour an 8" x 4" loaf pan.  Set aside.

3. Sift the self raising flour, baking powder, sugar, cocoa powder and salt in a bowl.  Set aside.

4. Whisk the warm water, vanilla essence, oil and apple cider vinegar in a mixing bowl using a hand whisk.

5. Fold in the flour mixture and stir until blended.

6. Pour into the prepared pan.

7. Bake for 30 to 35 minutes or until a skewer inserted in the middle of the cake comes out clean.

8. Let cake cool on a wire rack.


TIPS

1. All these years, I only use Hersheys cocoa powder.  I have tried other brands but my preference is Hersheys.

2. For the vegetable oil, I use a mixture of canola and sunflower oil.

Tuesday, October 15, 2013

Ice cream cake


This is an extremely easy recipe that I obtained from a facebook post. However, the first time I attempted this (following the recipe exactly), I failed miserably. The end result was rock hard and the cake did not rise at all.

Today, feeling brave (or rather, it was because I wanted to clear the freezer!), I decided to make a second attempt. Recalling the previous attempt, I tweaked the recipe. This time, the cake rose beautifully.


INGREDIENTS

1 1/2 cups self-raising flour
1 tsp baking powder
2 cups ice cream (softened)
1 pkt (150g) toddler fruit puree


METHOD

1. Preheat the oven to 180 degrees celsius.

2. Grease and flour an 8" x 4" baking pan.  Set aside.

3. Sift the self-raising flour with the baking powder in a mixing bowl.

4. Add the ice cream and fruit puree to the flour mixture and whisk using an electric mixer till evenly mixed.

5. Pour into the prepared pan.

6. Bake for 45 minutes or until a skewer inserted in the middle of the cake comes out clean.


TIPS

1. The creamier the ice cream, the better.

2. Do ensure that the flavour of the ice cream and the flavour of the fruit puree are complementary.

3. The ice cream should be softened before you add it to the flour mixture.  What would happen if the ice cream is not softened enough? Well, you will get "flying batter" all over your kitchen when you switch on the electric mixer! Trust me... the clean up is horrendous! (Yes, this is from personal experience!)

Sunday, September 1, 2013

apple and raisin bread pudding


I was reading posts on facebook this evening when I came across a question asked in a facebook group that I am a member of.  The member asked what to do with her bread that was expiring today. Amongst the numerous suggestions, one stood out to me (simply because I had not made that for some time) - bread pudding.


While I was waiting for Princess Chickadee's and Baby Chickadee's dinners to be heated up, I rummaged through my refrigerator and larder, searching for ingredients that I can use to bake a bread pudding.


Yes, this recipe is as easy as A-B-C.  You can even prepare the dish while waiting for, say, a soup (that you had cooked earlier) to be heated up on the stove (which was what I did, actually).


The photograph below is what I whipped up in less than 10 minutes.  I know.... it looks somewhat unpalatable but the end result is ooh-la-la!


INGREDIENTS

2 eggs
1 cup low fat milk
2 tbsp brown sugar
1/4 tsp ground cinnamon
1 red apple (peeled, cored and cubed)
1/2 cup raisins
4 slices bread


METHOD

1. Preheat the oven to 180 degrees celsius.

2. Grease and line a loaf pan with baking paper (I use Glad Bake).  Set aside.

3. In a mixing bowl, whisk the eggs and milk using a hand whisk for about a minute.

4. Add the brown sugar and ground cinnamon and mix well.

5. Add the apples, raising and bread.  Mix thoroughly with a ladle and set aside for 5 minutes.

6. Pour into the prepared pan and bake for 45 minutes or until a skewer inserted into the bread pudding comes out clean.


TIP

1. Do not overbake otherwise the pudding becomes hard.

2. You can use any square sandwich bread of your choice.  In my case, I used the Gardenia bread that is recommended for toddlers.  The Chickadees like this bread but the two of them are not able to finish an entire loaf before the expiry date.

Sunday, August 4, 2013

moist banana butter cake


I have been wanting to bake a butter cake for some time.

I finally had an opportunity today.  Da had brought Princess Chickadee for an evening walk to the nearby pasar malam.  While they were out, I brought the overripe bananas from the dining table to the kitchen and got down to business.


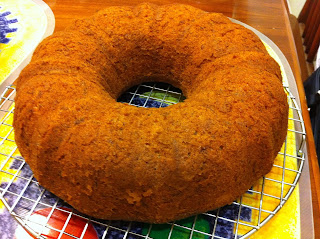
I love my bundt pan.  Every cake that I bake using the bundt pan turns out fine.  The only problem is that the pan is getting old and hence, the non-stick surface is not that good nowadays.  Perhaps it is time to buy a new bundt pan. :)

While the cake was baking in the oven, I fed Baby Chickadee her dinner.  The little one was in a playful mood this evening and it was a tad difficult to feed her.  As we were enjoying each other's company, the lovely aroma of bananas waffled from the kitchen to the dining area.  Yummy!


INGREDIENTS

2 cups self-raising flour
250g butter (softened)
3/4 cup castor sugar
1 tsp banana essence
4 eggs
4 medium bananas (mashed)
1 tbsp low fat milk


METHOD

1. Preheat the oven to 180 degrees celsius.

2. Grease and flour a bundt pan.  Set aside.

3. Sift the self-raising flour in a bowl.  Set aside.

4. Cream the butter, sugar and banana essence using an electric mixer.

5. Add the eggs, 1 at a time, mixing well with each addition.

6. Add the mashed bananas.

7. Fold in 1/2 the flour and mix well.  Add the remaining flour and mix well.

8. Stir in the milk.  You should get a soft dropping consistency.

9. Pour into the prepared pan.

10. Bake for 45 minutes or until a skewer inserted into the cake comes out clean.

11. Let the cake cool (in the pan) for 5 minutes on a wire rack before turning the cake over to cool thoroughly (if you can wait that long before slicing!). 

Sunday, June 30, 2013

peanut butter bread


All who know me will tell you that I love peanut butter.

One of my friends shakes her head whenever I order toasted bread with peanut butter and kaya.  The traditional way to eat toasted bread with peanut butter is with... well... butter.  But I simply love the peanut butter and kaya combination although I will be the first to admit that it is a tad too sweet.

This recipe yields a lovely loaf with a wonderful peanuty aroma.  Be sure to use crunchy peanut butter (instead of creamy peanut butter) so that you get the crunchy bits when you eat the bread.


INGREDIENTS

1 3/8 cups water
3 tbsp peanut butter
1 tbsp oil
11/2 tsp salt
2 tsp sugar
2 tbsp milk powder
3 cups bread flour
2 tsp instant yeast


METHOD

1. Add the ingredients to the bucket of the breadmaker in the order in which you see above.

2. Insert the bucket in the breadmaker.  Set to dough function and start the cycle.

3. When the cycle has been completed, turn the dough onto a floured board.

4. Using floured hands, knead the dough a few times.

5. Place the dough in a loaf pan that has been greased and lined with baking paper.   Spread out the dough in the loaf pan.

6. Cover the loaf pan with a dry cloth and leave for 1 hour.  The dough will continue its proofing process and rise further.

7. Bake the bread in an oven preheated to 180 degrees celsius for about 30 to 35 minutes.


TIPS

1. I use crunchy peanut butter.  Yums!

2. For the oil, I use a mixture of sunflower and canola oil.  You can substitute this with any other type of vegetable oil.

3. Da and I do not have a habit of drinking milk made using milk powder.  As such, we usually only have formula milk at home.  I use the formula milk powder when I do not have regular milk powder available.

pancakes for toddlers


These pancakes are not only yummy, they are popular with toddlers and they freeze well.

What more can one ask for?


INGREDIENTS

1 cup plain flour
1 1/2 tsp baking powder
1/4 tsp salt
1 tbsp butter (melted)
1/2 cup milk
1 egg (beaten)
1/2 tsp vanilla essence
1 1/4 cups fruit puree of your choice


METHOD

1. Sift the plain flour, baking powder and salt in a large mixing bowl.  Set aside.

2. Mix the butter, milk and egg in a bowl.

3. Stir the wet ingredients into the dry ingredients.

4. Add the vanilla essence and fruit puree.

5. Spoon onto a hot non-stick pan that has been greased with butter/margarine.

6. Cook the pancakes at low heat on one side.

7. Flip the pancakes over to the other side and cook till the other side is done.


TIP

1. I used low fat milk because that is what I normally buy for our home.  You can substitute with full cream milk.

2. I usually make my own fruit puree (I steam a variety of fruits and blend them before freezing the puree in portions) but you can use commercially sold fruit puree that is meant for babies/toddlers.

Friday, May 31, 2013

Nutella muffins


Okay, I was skeptical when I read internet reviews about a wonderful recipe for muffins that requires only 3 ingredients.

However, I remembered a certain someone who drew up an Agreement for Sale and Purchase in respect of an immovable property that contained only 3 clauses so I figured that anything is possible in life.

I googled "Nutella muffins" and found many links.  What I noticed was that the recipe was almost identical in these various internet pages and I also noticed positive feedback.

So what did I do?  Well, naturally I rushed to the supermarket nearest to my office during my lunch hour on a weekday and bought the largest container of Nutella that I could find.  Judging from the reviews on the internet, I decided that I might as well buy a larger container as this recipe is sure to be a keeper.


I finally got round to baking the muffins and I was not disappointed.

I do have a caveat, though.  I personally find the muffins a little dense.  When I next bake these muffins, I will add 1/2 tsp of baking powder to the cake flour.


INGREDIENTS

1 cup Nutella
1 egg (beaten)
10 tbsp cake flour


METHOD

1. Preheat the oven to 180 degrees celsius.

2. Line the muffin pans with paper cases.  Set aside.

3. Sift the cake flour in a bowl.  Set aside.

4. Mix the Nutella and egg until smooth.

5. Fold in the sifted flour.

6. Fill the muffin cases till about 3/4 full.

7. Bake for 20 minutes or until a toothpick inserted in the middle of the muffin comes out clean.


TIPS

You may notice muffin crumbs stuck to it but this is alright - as the muffin cools down, the muffin will become more dry.  As such, you should not overbake the muffins.

Friday, May 3, 2013

chocolate mayonnaise cake


I will admit that I have not been updating my food blog as frequently as I would have liked.  It is not to say that I have not been baking / cooking for some time.  In fact, weekend baking has become a family affair for Princess Chickadee and me.  Ever since she started showing interest in baking, I have been encouraging her to bake.  Her bakes do not necessarily always turn out perfect but it is the process that I would like her to enjoy.  Also, there are other benefits such as bonding, learning to listen to instructions, etc.


I happened to wake up early on 1 May 2013 (it being a public holiday). My family had plans to meet at my mother's home at 9.30 am that day before we proceeded to Mount Vernon Columbaria to pay respects to my late daddy.  While waiting for the Chickadees to wake up, I decided to try my hand at baking this cake.


I have had this recipe for some time.  I cannot even recall where I obtained it from.  It is probably something I happened to come across as I was surfing the internet.  I kept the recipe because I was intrigued by the use of mayonnaise in a cake recipe.  However, as cake flour (which the recipe called for) and mayonnaise are something that I do not always have in my kitchen, I did not have the opportunity to bake this cake until now because I happened to have these two ingredients.  The rest of the ingredients are usual ingredients commonly found in cake recipes.


I was pleasantly surprised when I saw the cake rising in the oven.  If you look at the photograph below, you will see how evenly the cake rose.  Sometimes, when I bake cakes, the cake rises unevenly and I end up with "craters".  This cake rose perfectly.  I was tremendously pleased.


I separated the cake batter into two portions.  I baked one of the cakes in a bundt pan and I baked the other cake in a regular round cake pan.  Both cakes came out lovely.


Da ate three slices of the cake at one go that night, after a heavy dinner.  He does not have a "sweet tooth" so the fact that he ate so many slices at one go is testimony to how yummy the cake is.  I would encourage you to try the recipe.


INGREDIENTS

280g cake flour
3 tsp baking powder
1 tsp bicarbonate of soda
50g cocoa powder
3 eggs
300g castor sugar
1 tsp vanilla essence
250ml water
250ml mayonnaise


METHOD

1. Preheat the oven to 180 degrees celsius.

2. Grease and flour/line the cake pan.  Set aside.

3. Sift the cake flour, baking powder, bicarbonate of soda and cocoa powder in a bowl.  Set aside.

4. Beat the eggs and sugar in a mixing bowl using a hand whisk until light and fluffy.  Add the vanilla essence and mix well.

5. Combine the water and mayonnaise in a bowl.  Add to the egg/sugar mixture, alternately with the flour mixture.  Mix well until a hand whisk.

6. Pour the batter into the prepared pan.

7. Tap the cake pan several times on the table to release the air bubbles.

8. Bake in the preheated oven for about 35 minutes or until a skewer inserted in the middle of the cake comes out clean.

9. Leave the cake in the pan for a few minutes before turning onto a wire rack to cool completely.


TIPS

1. Although the original recipe called for "extra large eggs", I used the regular sized eggs commonly sold in the supermarkets.  The cake turned out fine.

2. I am very particular about the brand of cocoa powder that I use for baking.  After trying several brands, my personal view is that I would recommend Hersheys cocoa powder.  You can smell the lovely aroma of the cocoa powder while the cake is baking in the oven.

3.  I used an "entry level" brand of mayonnaise that we had in the refrigerator (which we had bought because it was stored in a plastic container instead of a glass container - it was purely for safety reasons because I did not want Princess Chickadee to hold a heavy glass container when she makes her egg mayonnaise sandwiches). Some of my colleagues have sworn that the yummiest mayonnaise is the one where there is a picture of a baby on the bottle.  I intend to hunt for this brand of mayonnaise and try it to see whether the mayonnaise is indeed more delicious.

4. The texture of this cake is more spongy as compared to the regular cakes that I am used to baking.  Notwithstanding this, the cake is moist and soft and it remained so even the next day.  I do not know whether it will continue to remain moist on the 3rd day after baking because the cake ran out by the 2nd day. :)


Monday, April 1, 2013

soft dinner rolls


I love bread.  I love to bake bread and I love to eat freshly baked bread!


I have always liked soft dinner rolls because they are so versatile. You can eat them on their own, dip them into stew, spread butter on warmed dinner rolls... the list is endless. I have even sliced a dinner roll into two (cross-section horizontally) and added a small slice of bak kwa (barbecued pork) in between. Yummy!


Here is a simple recipe that yields a large batch of soft dinner rolls. You can either use a bread maker to make the dough (which is my preference) or you can prepare it using a cake mixer with dough hooks.


INGREDIENTS

1 1/4 cups low fat milk (warm)
3 tbsp butter (melted and cooled)
1 egg (beaten)
3/4 tsp salt
2 tbsp castor sugar
3 cups bread flour
2 1/2 tsp instant yeast


METHOD

1. Line a baking tray with baking paper. Set aside.

2. Place all the ingredients in the bucket of the breadmaker, in the order in which they appear in the ingredient list above.

3. Place the bucket in the breadmaker and select the dough function. Start the cycle.

4. When the cycle has been completed, turn the dough onto a floured board. Using floured hands, knead the dough a few times.

5. Separate the dough into several small balls. The number of balls would depend on the size of your baking tray.

6. Place the balls about 2" apart on the baking tray.

7. Cover the baking tray with a dry cloth and leave for 1 hour or until the dough has increased in size and the balls are touching each other.

8. Bake in an oven preheated to 180 degrees celsius for 20 minutes. 


TIP

1. The yeast should not touch the liquid before the dough cycle starts. As such, do make sure that the bread flour has covered all the liquid before you add the yeast last.

2. I place the baking tray in the middle rack of my under-the-stove oven.


Blog Widget by LinkWithin