Wednesday, June 30, 2010

peanut butter cake

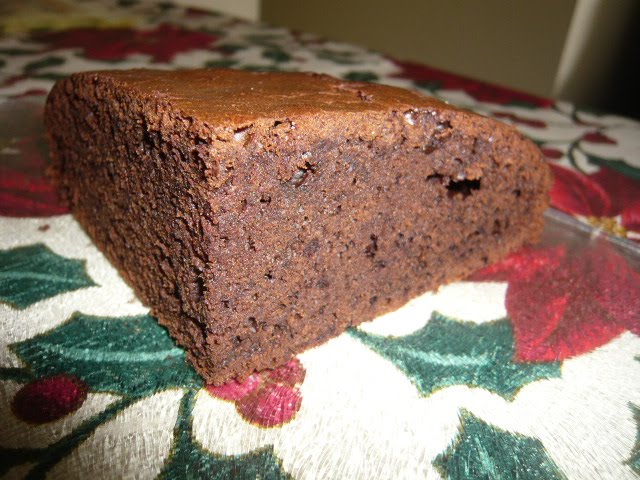
When I posted a photograph of this peanut butter cake in my facebook, I could not resist adding a comment that the cake is "super moist".

Even as I sliced the cake, I could tell by how easily the knife glided through the cake that the cake was soft and moist.

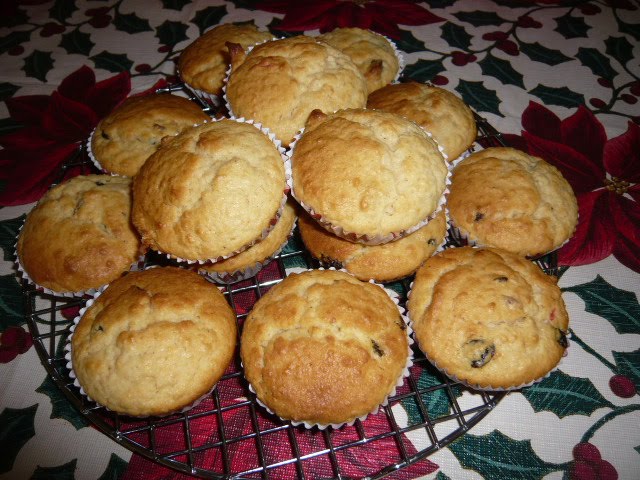
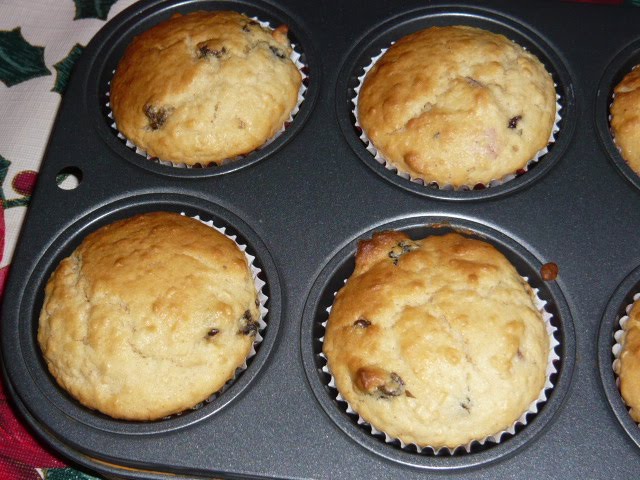
I love using peanut butter in my baking. I have baked peanut butter bread, peanut butter cookies and peanut butter muffins. I have now added peanut butter cake to my repertoire.

For this cake, I added crunchy peanut butter. That way, when you bite into the cake, you will also taste the crunchy bits of the peanuts.

The batter rises a lot during the baking process. As such, it would be advisable to use a cake pan that is higher, such as a bundt pan.

This cake complements a hot mug of coffee or tea. Bon appetit!

INGREDIENTS

1 1/2 cups plain flour
2/3 cup self-raising flour
1/2 tsp bicarbonate of soda
250g butter (softened)
2/3 cup brown sugar
2/3 cup crunchy peanut butter
2/3 cup honey
2/3 cup water

METHOD

1. Preheat the oven to 160 degrees celsius.

2. Grease and flour a bundt pan. Set aside.

3. Sift the plain flour, self-raising flour and bicarbonate of soda in a bowl. Set aside.

4. Cream the butter and sugar in a mixing bowl using an electric mixer until light and fluffy.

5. Add the crunchy peanut butter and mix until blended.

6. Add the honey and water and mix well.

7. Fold in the flour mixture using a wooden spatula and stir until blended.

8. Pour the batter into the prepared pan and bake for 1 hour or until a skewer inserted near the middle of the cake comes out clean.

9. Let the cake cool for 5 minutes in the cake pan before turning the cake onto a wire rack to cool thoroughly.

Monday, June 28, 2010

fruit and cereal muffins

I am getting the hang of baking muffins. I love baking varieties of muffins.

In the past, I would faithfully fill the paper muffin cases with the batter till 2/3 full. However, nowadays I fill the paper muffin cases till almost full. That way, the muffin will rise way above the paper muffin case and I end up with a delicious and large muffin.

After many experiments at baking muffins, I have found that insofar as my tabletop oven is concerned, the ideal baking temperature and time are at 180 degrees celsius for 20 minutes.

Baking muffins are also a useful way of using up leftover ingredients that you have at home, such as chocolate chips, dried fruits, peanut butter, etc. The varieties are endless.

For these muffins, I added a mixture of dried mixed fruit and Nestum instant cereal. This combination of ingredients was popular with the persons with whom I shared the muffins.

In case you are wondering why there are so many photographs of the muffins in this post, it is because the muffins rose so beautifully when baked that I could not resist taking a lot of photographs of the muffins.

If you do not have a non-stick muffin pan, I would encourage you to invest in one. The clean-up is easy and the muffins do not stick to the pan, even if the batter spills out.

INGREDIENTS

220g self-raising flour
100g castor sugar
100g butter
1 egg (lightly beaten)
1 tsp orange essence
250ml low fat milk
1/3 cup dried mixed fruits
1/3 cup Nestum instant cereal

METHOD

1. Preheat the oven to 180 degrees celsius.

2. Line the muffin pan with paper muffin cases. Set aside.

3. Sift the self-raising flour in a bowl. Set aside.

4. Cream the butter and sugar in a mixing bowl using an electric mixer until light and fluffy.

5. Add the egg and beat well.

6. Add the orange essence and milk.

7. Stir in the dried mixed fruit and Nestum instant cereal.

8. Fold in the self-raising flour using a wooden spatula and stir until just blended. Do not over-mix.

9. Fill the paper muffin cases till almost full.

10. Bake for 20 minutes or until a skewer inserted near the middle of the muffin comes out clean.


Saturday, June 26, 2010

cornflake cake

When I baked this cake, I filled the bottom of the cake pan with coarsely crushed cornflakes.

The next time that I bake this cake, I intend to try a variation - I will liberally sprinkle the top of the cake batter with the crushed cornflakes instead. I am curious to see which version tastes nicer.

For the cornflakes, I used the type that has mixed fruits and nuts added to the cornflakes. If you intend to use plain cornflakes, I would recommend that you increase the quantity of castor sugar that you add to the cake batter to 80g.

INGREDIENTS

100g self-raising flour
1/4 tsp baking powder
1/8 tsp salt
60g butter (softened)
60g castor sugar
1 egg (lightly beaten)
100ml milk
fruit and nut cornflakes (coarsely crushed)

METHOD

1. Preheat the oven to 180 degrees celsius.

2. Grease and flour an 8" round cake pan. Set aside.

3. Sift the self-raising flour, baking powder and salt in a bowl. Set aside.

4. Cream the butter and sugar in a mixing bowl using an electric mixer until light and fluffy.

5. Add the egg and mix well.

6. Add the milk and beat until well combined.

7. Fold in the flour mixture using a wooden spatula and stir until well blended.

8. Line the bottom of the cake pan with the cornflakes.

9. Pour the batter on top of the cornflakes.

10. Bake for 25 minutes or until a skewer inserted in the middle of the cake comes out clean.


Thursday, June 24, 2010

surprise muffins

In case you are wondering why I have named these muffins as "surprise muffins", it is because when you bite into the muffins, you will get a surprise. Inside the muffins are something crunchy. What could it be?

I had added crushed cookies to the muffin batter. You can use any type of cookies you like but in this case, I used the balance of the Chinese New Year goodies which is locally known as "rope". It is so named because it is made in the shape of a rope. I used my fingers to crush the "rope" because I wanted the filling of the muffins to be tasted instead of blending into the muffin batter.

INGREDIENTS

220g self-raising flour
100g butter (softened)
100g castor sugar
1 egg (lightly beaten)
250ml milk
1 tsp vanilla essence
1/2 cup cookies (coarsely crushed)

METHOD

1. Preheat the oven to 180 degrees celsius.

2. Line the muffin pans with paper muffin cases. Set aside.

3. Sift the self-raising flour in a bowl. Set aside.

4. Cream the butter and sugar in a mixing bowl using an electric mixer until light and fluffy.

5. Add the egg and mix well.

6. Add the milk and vanilla essence and mix until blended.

7. Add the crushed cookies and fold in the flour mixture using a wooden spatula and stir until just combined. Do not over-stir.

8. Fill the muffin paper cases till about 3/4 full.

9. Bake for 20 minutes or until a skewer inserted in the middle of the muffin comes out clean.


Tuesday, June 22, 2010

chocolate chip doughnuts

I love the non-stick doughnut pans that I bought from a shop at Seah Street. When you step into the shop, you feel like Alice in Wonderland. There are so many types of baking equipment sold in the shop that your mind goes blank except for "buy, buy, buy!".

I bought the non-stick doughnut pans for S$7 each.

When I baked the doughnuts that you see in this post, I did not have on hand a copy of the doughnut recipe that I usually use. I did not feel like logging into my computer and checking the recipe from my blog and as such, I decided to "bite the bullet" and improve as I prepared the batter.

The outcome? I will leave it to you to give this recipe a try but suffice to say that I had no complaints about the end product.

INGREDIENTS

100g self-raising flour
1/4 tsp baking powder
pinch of salt
60g butter (softened)
60g castor sugar
1 egg
200ml flavoured yoghurt drink - I used non-fat mango yoghurt drink
1/2 cup mini chocolate chips

METHOD

1. Preheat the oven to 180 degrees celsius.

2. Grease the doughnut pan. Set aside.

3. Sift the self-raising flour, baking powder and salt in a bowl. Set aside.

4. Cream the butter and sugar in a bowl using an electric mixer until light and fluffy.

5. Add the egg and mix well.

6. Add the yoghurt drink and beat until well combined.

7. Fold in the flour mixture using a wooden spatula and stir until blended.

8. Add the chocolate chips and mix well.

9. Fill the doughnut pans about 2/3 full.

10. Bake for 15 minutes or until a toothpick inserted near the middle of the doughnut comes out clean.

11. Let the doughnuts cool on a wire rack.


Sunday, June 20, 2010

bacon bread

The Italians have a tradition of combining meat to their bread, such as meat loaf, pizza, etc. One of these days, I intend to get round of adding cooked and shredded meat (such as pork roast) to my bread dough - I believe that the bread would taste very yummy.

One of my colleagues has a contact where we can order frozen meat at wholesale prices. As such, it is not uncommon to see some of us lugging home packets of frozen back bacon, frozen picnic ham, frozen sausages, etc on a frequent basis. *grin*

For this loaf of bread, I added back bacon to the bread dough. The bread tastes a little savoury (due to the inclusion of the back bacon). For a simple dinner, I microwaved frozen Muar otah on HIGH for 2 minutes, spread the otah onto a slice of the bacon bread (which I had buttered) and I toasted the bread in the oven at 160 degrees celsius for 10 minutes. It was delicious!

This recipe is adapted from a recipe for Italian pork bread that I came across in a recipe book called "Specialty breads in your bread machine".

INGREDIENTS

200g warm water
2 1/2 tbsp castor sugar
3/4 tsp salt
3/8 tsp freshly ground black peppercorn
2 5/8 cup bread flour
1 1/2 tsp instant dry yeast
3/4 cup back bacon (cut into medium-sized pieces)

METHOD

1. Place all the ingredients (except the bread flour, yeast and bacon) in the bucket of the breadmaker machine.

2. Add the bread flour, making sure that the wet ingredients are totally covered.

3. Add the yeast.

4. Place the bucket in the breadmaker machine and set to "dough" cycle. Start the cycle.

5. Five minutes into the dough cycle, open the lid of the breadmaker machine and add the bacon without stopping the cycle. Replace the lid and let the cycle continue.

6. When the cycle has been completed, turn the dough onto a floured board. Using floured hands, knead the dough 5 times.

7. Place the dough in a loaf pan that has been greased and lined with baking paper. Spread out the dough such that it touches the sides of the loaf pan.

8. Cover the loaf pan with a dry cloth and leave for 1 hour or until the dough has doubled in size.

9. Bake in an oven preheated to 180 degrees celsius for 30 minutes.


Friday, June 18, 2010

dragonfruit and banana smoothie

I like to eat dragonfruit but I prefer the type that has white flesh because I find them sweeter.

However, when MIL gave us some dragonfruit with pink flesh, I ate a slice and was pleasantly surprised to find it sweet.

It so happened that FIL gave us some overripe bananas as well. Actually, when FIL gave us the bananas, he told us that the bananas were for me to do baking. I think that FIL has resigned himself to the fact that whenever he gives us bananas, I will save them until they become overripe and then use them for baking. As such, if he has any leftover bananas at home that have become overripe, he now gives them to me.

This is a simple combination of pink dragonfruit and banana. When my family came to our home for dinner and I gave them a glass of the smoothie each, my mother and my brother (LG) liked the smoothie so much that they had a second glass each.

INGREDIENTS

500ml plain non-fat yoghurt
3 large overripe bananas
1 large pink dragonfruit


METHOD

1. Place all the ingredients in a blender and blend until smooth.

2. Chill before serving.

Wednesday, June 16, 2010

mocca fudge cake

I was in one of those "let's flip through a cookbook" day. I pulled out my Australian Women's Weekly Cakes & Slices cookbook and flipped through the cookbook without having anything in particular in mind to bake.

There is a section in this cookbook entitled "Quick-Mix". It is intended to be an all-in-one recipe where you put all the ingredients together and beat the mixture using an electric mixer.

I decided to give the chocolate fudge cake recipe a try. However, I did not have on hand 250g dark cooking chocolate. I only had a bar of Hersheys baking chocolate (it was 113g - 8 squares).

What you see here is a modification of the recipe. As I used a hand whisk instead of an electric mixer, I modified the steps as well.

The cake remained fudgey even on the next night.

INGREDIENTS

113g Hersheys cooking chocolate (8 squares)
125g butter
2/3 cup castor sugar
2/3 cup self-raising flour
1/8 cup instant 3-in-1 coffee (I used 3-in-1 instant Ipoh white coffee, hazelnut flavour)
4 eggs

METHOD

1. Preheat the oven to 180 degrees celsius.

2. Grease and flour an 8" round cake pan. Set aside.

3. Melt the chocolate and butter over hot water. Leave the melted mixture to cool.

4. Mix the castor sugar, self-raising flour and coffee using a hand whisk.

5. Add the egg, one at a time.

6. Add the chocolate mixture and mix until blended.

7. Pour the batter into the prepared pan.

8. Bake for 30 to 35 minutes or until a skewer inserted in the middle of the cake comes out clean.


Blog Widget by LinkWithin