Thursday, December 30, 2010

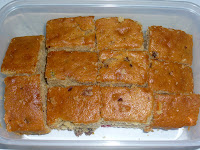
mixed fruit scones

When I was a student, I would go to Goodwood Park Hotel once in a while with my friends (BW and EK) for English high tea buffet. I have a weakness for sandwiches and scones. Scones are best eaten warm with jam and fresh cream. If you do not have jam and fresh cream readily available, butter and peanut butter are good alternatives.

A basic scone recipe is quite simple. It involves self-raising flour, castor sugar, salt, butter, milk and water. There are so many variations of scones that that we can bake, depending on what ingredients we have at home. When we sit down and enjoy a warm scone, it should be accompanied by a steaming hot cup of coffee or tea as they complement each other so well.

Many scone recipes include an approximate amount of liquid. The reason why the liquid amount is approximate is because it depends on the rate at which the flour absorbs the liquid. The moisture content of the flour would vary depending on the freshness of the flour and the weather. I would recommend that you add half the amount of liquid stated in the recipe and mix it with the flour first. Add more liquid slowly until the dough is soft and sticky but holds its shape when you turn it onto a board to knead it.

I have set out in this post the recipe for mixed fruit scones. Feel free to make variations of the scones. After all, variety is the spice of life! What is important to remember is that when you turn the dough onto a board to knead the dough, the board should be lightly floured and your hands should be lightly dusted with flour.

Ingredients

2 1/2 cups self-raising flour
1 tbsp castor sugar
1/4 tsp salt
1/4 tsp ground cinnamon
1/2 cup dried mixed fruits
30g butter
3/4 cup milk
1/2 cup water (approximately)

Method

1. Preheat the oven to 200 degrees celsius.

2. Grease two 9" square cake pans. Set aside.

3. Sift the flour, sugar, salt and ground cinnamon into a large bowl.

4. Rub the butter into the flour mixture using your fingertips.

5. Add the mixed fruits and mix well.

6. Use a knife to stir in the milk and enough water to mix to dough that is sticky but which is firm enough to be kneaded.

7. Turn the dough onto a lightly floured surface (I use my longer rectangular chopping board and I flour it). Lightly dust your hands with flour and knead the dough until it is smooth.

8. Use a lightly floured rolling pin, roll out the dough evenly to 2 cm thickness. Cut out the dough into 5 cm rounds.

9. Place the scones into the prepared cake pans.

10. Brush the scones with a little milk.

11. Bake at 200 degrees celsius on the middle shelf for 15 minutes.

12. Let the scones cool before you store them in an air-tight container.

Tuesday, December 28, 2010

light fruit cake with chocolate rice

Many people hesitate to buy, bake or even eat fruit cake because most fruit cakes are very dense and rich. In fact, for the fruit cakes that are baked several weeks before Christmas in preparation of the festive season, you are advised to freeze the fruit cake and once a week, unwrap the cake and liberally pour brandy over the cake before wrapping the cake again and placing the cake back in the freezer. By the time Christmas arrives, you have a wonderfully dense fruit cake that is ready to be shared with one and all.

If you like to eat fruit cakes but are not overly fond of fruit cakes that are very dense, here is my recipe for light fruit cake with chocolate rice. You can omit the chocolate rice if you do not like it. I find that the inclusion of the chocolate rice makes the cake a hit with children.

Ingredients

1 1/4 cups self-raising flour
1 tsp ground cinnamon
1/2 cup ground almond
250 g butter (softened)
1/2 cup castor sugar
1/2 cup brown sugar
1/2 cup milk
1 tsp vanilla essence
1/3 cup peanut oil
2 eggs
1 cup dried mixed fruit (bloomed)
1/2 cup chocolate rice


Before I elaborate on the method, I wish to explain what I mean by "blooming" the dried mixed fruits. You can, of course, add the dried mixed fruits directly to the batter. However, I have found that if I were to bloom the mixed fruits before adding it to the batter, the mixed fruits tend to be softer and easier to chew.

To bloom the dried mixed fruits, what you will need to do is to soak the dried mixed fruits in some room temperature water. When the fruits have softened, drain away the water before you add the mixed fruits to the batter.

Method

1. Preheat the oven to 180 degrees celsius.

2. Sift the self-raising flour, ground cinnamon and ground almond. Set aside.

3. Whisk the butter, castor sugar and brown sugar until light and fluffy.

4. Add the milk, vanilla essence and peanut oil. Mix well.

5. Add the eggs, 1 at a time.

6. Stir in the mixed fruits and chocolate rice.

7. Fold in the flour mixture and mix well.

8. Bake for 45 minutes or until a skewer inserted in the centre of the cake comes out clean.

Tips

1. As my table-top Moulinex oven is old (Da and I bought it in 1998), the baking time for my oven for an 8" or 9" square cake is around 1 hour.

2. If you want your cake to be chocolatey, you can add 2 tbsp of Milo and 2 tsbp of cocoa powder and sift it together with the self-raising flour.

Sunday, December 26, 2010

kiwifruit and strawberry yoghurt cake

Whenever I add fresh fruits to a cake, I would usually cut the cake into two portions and sandwich the fruits between the two portions of cake using cream cheese frosting or whipped cream.

This time, I added two layers of fruits to the cake batter before baking the cake. The end result was that both layers of fruits seemed to sink to the bottom and towards the sides of the cake. Despite this, the cake was moist and delicious. If you do not want to add the fruits, you can still use the recipe in this post to bake the cake on its own. The cake has a lovely muffin-like texture.

INGREDIENTS

1 cup plain flour
2 tsp baking powder
1/2 cup ground almond
1/2 tsp ground cinnamon
1/2 cup non-fat plain yoghurt
1/2 cup brown sugar
1/2 cup castor sugar
3 eggs (lightly beaten)
1/2 cup sunflower oil
kiwifruit (sliced)
strawberries (sliced)


METHOD

1. Preheat the oven to 180 degrees.

2. Grease and flour an 8" round cake pan.

3. Sift the plain flour, baking powder, ground almond and ground cinnamon in a bowl. Set aside.

4. Mix the plain yoghurt, brown sugar, castor sugar and eggs in a large bowl using a wooden spoon.

5. Fold in the flour mixture and mix until combined.

6. Add the oil and mix well.

7. Fill 1/3 of the batter in the cake pan, arrange the sliced kiwifruit and sliced strawberries on top of the batter. Fill another 1/3 of the batter and arrange the sliced kiwifruit and sliced strawberries on top of the batter. Pour the remaining 1/3 of the batter over the fruits.

8. Bake for 45 minutes or until a skewer inserted in the middle of the cake comes out clean.

TIP


If the cake is not intended to be eaten immediately upon slicing, what I normally do is to place the sliced cake back in the cake pan. Before I serve the cake, I warm up the cake in the oven at 140 degrees for 5 minutes.

Friday, December 24, 2010

raisin bread

I like to eat raisin bread, especially those with ground all-spice / mixed spice added to the bread dough. It is so aromatic and utterly irresistible.

Raisin bread is flavourful enough to be eaten on its own. When the fancy takes me, I will spread butter or peanut butter on the slice of raisin bread. For extra oomph, I would recommend that you spread butter on a slice of raisin bread and thereafter toast the bread in an oven. Yummy!

What was interesting about the raisin bread that I baked was that even though I added castor sugar instead of brown sugar, the bread turned out brown instead of white in colour. It may be due to the all-spice / mixed spice and/or the "juice" from the raisins. As I only used the "dough" cycle of my breadmaker machine, I added the raisins together with the rest of the ingredients. If you are using the full bread cycle of your breadmaker machine, you may like to add the raisins only when you hear the beep in your breadmaker machine (if your machine has such a beep function).

INGREDIENTS

1 cup water
2 tbsp butter
3 tbsp castor sugar
1 1/2 tsp salt
1 tsp ground all-spice / mixed spice
3/4 cup raisins
3 cups bread flour
2 1/2 tsp instant dry yeast

METHOD

1. Place all the ingredients (except the bread flour and the yeast) in the bucket of your breadmaker machine.

2. Add the bread flour, making sure that the wet ingredients are totally covered.

3. Add the yeast.

4. Place the bucket in the breadmaker machine and set to "dough" cycle. Start the cycle.

5. When the "dough" cycle has been completed, turn the dough onto a floured board. Using floured hands, knead the dough about 5 times.

6. Place the dough in a loaf pan that has been greased and lined with baking paper.

7. Cover the loaf pan with a damp cloth and leave for 1 hour or until the dough has doubled in size.

8. Bake in an oven preheated to 180 degrees celsius for 35 minutes.

9. Let the bread cool thoroughly before slicing.

Wednesday, December 22, 2010

mixed berries and banana smoothie

This is my first attempt at making a smoothie and I must say that I am very pleased with the results. *grin*

I decided to make smoothies because we happened to have have quite a lot of fruits in our refrigerator. Nowadays, non-fat plain yoghurt is one of the regular items that we buy whenever we do grocery shopping, so the yoghurt came in handy this time.

In the past, I did not buy plain yoghurt as I did not like the sour taste. Nowadays, I use plain yoghurt to make bread, cakes, etc. It is very versatile.

INGREDIENTS


6 large bananas
1/2 cup blueberries
1/2 cup raspberries
1/2 cup strawberries (halved)
3 cups non-fat plain yoghurt


METHOD


1. Peel the bananas. Slice them thickly and place them on a baking tray. Place the tray in the freezer and freeze the sliced bananas until they harden.

2. When the bananas have hardened, place the bananas in a blender.

3. Add the blueberries, raspberries, strawberries and plain yoghurt.

4. Blend until the mixture is smooth.

5. Pour the smoothie in a glass and chill before serving.

Monday, December 20, 2010

chocolate bread custard

Have you ever bought or baked a loaf of chocolate bread on a whim and then realised that you have having difficulty finishing the entire loaf?

You can use the leftover chocolate bread to make chocolate bread custard. This recipe is easy to follow and it does not require the use of the oven.


INGREDIENTS

chocolate bread (cut into small cubes)
tinned fruits (eg. peaches, rambutan with pineapple, etc) (cut into small pieces)
200 ml water
2 tsp gelatine granules
100 ml blackcurrant and apple juice cordial (or any other juice cordial of your choice)
500 ml low fat milk
2 egg yolks
1/2 cup castor sugar
2 tbsp cornflour
1/4 tsp orange essence

METHOD

1. Cut the chocolate bread into small cubes and arrange in a single layer in a pudding cup. Press the bread in to make sure that the layer is compact.

2. Cut the tinned fruits into small pieces. Do not drain away the juice / syrup.

3. Spoon a little juice / syrup from the tinned fruits over the chocolate bread to moisten the bread.

4. Pour 200 ml water into a small bowl and sprinkle the gelatine granules. Do not stir. Set this aside for 15 minutes or until the gelatine granules swell and absorb the water.

5. Place the bowl of gelatine in a larger bowl of hot water. When the gelatine has melted, stir in the juice cordial.

6. Spoon the gelatine mixture into the pudding cup to just cover the bread. Set aside.

7. Pour the milk into a saucepan and heat on medium heat until it boils.

8. Beat the egg yolks and sugar in a large bowl until the mixture has thickened. Add the cornflour and orange essence and stir until the mixture has lightened in colour.

9. Pour the milk into the egg yolk mixture and stir. Pour this mixture back into the saucepan and cook over low heat, stirring constantly. When the mixture has boiled, cook for another 2 minutes before removing the saucepan from the heat. Cool the custard by placing the saucepan in a larger bowl of cold water.

11. Arrange a layer of cut fruits over the bread. Fill the pudding cup to the brim with the cooled custard. Refrigerate until the custard sets.

Saturday, December 18, 2010

sunflower and pumpkin seed bread

When I bought a packet of sunflower seeds and a packet of pumpkin seeds from ZTP Ginseng, I rubbed my hands in glee. There are a million and one types of food that I can make using these as ingredients.

Da's niece, SCT mixed the sunflower seeds with chopped walnuts and chopped pecans and used them as topping for a Mothers' Day cake for MIL this year.

I add chopped sunflower seeds to the batter for cake.

I have now gone one step further - I mixed the sunflower seeds and crushed pumpkin seeds and added them to the bread dough. The result? A delicious and soft loaf of sunflower and pumpkin seed bread.

INGREDIENTS

1 1/3 cups water
2 tbsp butter (softened)
3 tbsp honey
1 tsp salt
1/2 cup sunflower seeds
1/2 cup pumpkin seeds (crushed lightly)
1 1/2 cups bread flour
1 1/3 cup whole wheat flour
2 tsp instant dry yeast

METHOD

1. Add all the ingredients (except the bread flour, whole wheat flour and yeast) to the bucket of the breadmaker machine.

2. Add the bread flour and whole wheat flour, making sure that the wet ingredients are totally covered.

3. Add the yeast.

4. Place the bucket in the breadmaker machine and set to "dough" cycle. Start the cycle.

5. When the "dough" cycle has been completed, turn the dough onto a floured board. Using floured hands, knead the dough about 5 times.

6. Place the dough in a loaf pan that has been greased and lined with baking paper.

7. Cover the loaf pan with a damp cloth and leave for 1 hour or until the dough has doubled in size.

8. Bake in an oven preheated to 180 degrees celsius for 35 minutes.

TIP

As an alternative, you may like to substitute the 1/2 cup pumpkin seeds with 1/2 cup flax seeds.

Thursday, December 16, 2010

apple pie

This is a modified version of a traditional apple pie. Instead of preparing a pie crust, I prepared a biscuit base. For those of you who like pastries with biscuit bases (such as cheesecake), you may want to give this recipe a try.


INGREDIENTS (base)

120g digestive biscuits (crushed)
60g butter
3 tbsp brown sugar


INGREDIENTS (filling)

1 cup plain flour
1/2 cup whole wheat flour
1 3/4 tsp baking powder
1/4 tsp sale
1/2 cup castor sugar
2/3 x 250g bar of cream cheese (softened)
1/2 cup butter (softened)
1 tsp vanilla essence
2 eggs
1/4 cup cinnamon sugar
2 cups apples (cubed) (about 2 medium apples)


METHOD (base)

1. Preheat the oven to 180 degrees celsius.

2. Mix the crushed biscuits, butter and sugar in a bowl.

3. Press the biscuit mixture into the base of a pie dish.

4. Bake for 10 minutes.


METHOD (filling)

1. Preheat the oven to 180 degrees celsius.

2. Sift the plain flour, whole wheat flour, baking powder and salt in a bowl. Set aside.

3. Cream the castor sugar, cream cheese, butter and vanilla essence in a mixing bowl using an electric mixer at medium speed until well blended. Add the eggs, one at a time, mixing well with each addition.

4. Fold in the flour mixture and beat at low speed until blended.

5. Toss the cubed apples with the cinnamon sugar and stir into the batter.

6. Pour the batter on top of the biscuit base.

7. Bake for 25 to 30 minutes or until a skewer inserted in the middle of the filling comes out clean.

Tuesday, December 14, 2010

potato wheat bread

My mother's sister, AJ used to live in Taman Molek, Johor Bahru, Malaysia. Whenever my family visited her, we would do some grocery shopping at the Giant Hypermarket near her home. Without fail, my mother would buy some potato bread. It is a sweet bread that is light and goes well with a cup of coffee or tea.

There are two ways to make potato bread - using potato flakes or using mashed potato. Whichever way you choose, the bread tastes just as nice. The recipe in this post uses potato flakes.

INGREDIENTS

1/2 cup milk
1/2 cup warm water
1 egg
3 tbsp butter
2 1/2 tsp castor sugar
1 1/3 tsp salt
1/4 cup potato flakes
2 tbsp instant oats
1/3 cup sesame seeds
1 cup bread flour
2 cups whole wheat flour
2 tsp instant dry yeast
milk (for glazing)

METHOD

1. Place all the ingredients (except the bread flour, whole wheat flour and yeast) in the bucket of the breadmaker machine.

2. Add the bread flour and whole wheat flour, making sure that the wet ingredients are totally covered.

3. Add the yeast.

4. Place the bucket in the breadmaker machine and select "dough" cycle. Start the cycle.

5. When the cycle has been completed, turn the dough onto a floured board. Using floured hands, knead the dough about 5 times.

6. Place the dough in an 8" x 5" loaf pan that has been greased and lined with baking paper. Cover the pan with a moist cloth and leave for 1 hour or until the dough has doubled in size.

7. Brush the loaf with milk.

8. Bake in an oven preheated to 175 degrees celsius for 30 minutes.

9. Let the bread cool thoroughly before slicing.

pork porridge

It is easy to cook porridge for your little one. The advantage of cooking your own porridge instead of buying them from the stalls outside is that you never know whether the hawkers add MSG to the cooking.

I boil my own stock and use the stock to cook porridge or pasta for Princess.


Ingredients

500ml stock
2 tbsp uncooked white rice
125g minced pork


Method

1. Pour the stock in the pot

2. Rinse the rice and add to the stock.

3. Cook the porridge.

4. When the porridge is about done, stir in the minced pork and mix well,


Tips

1. There is no hard and fast rule when it comes to cooking the stock. You can use pork (I have recently switched from pork bone / pork ribs to muscle meat because it is less oily), threadfin bones, chicken bones, broccoli, tomato, baby spinach, baby chye sim, potato, carrot, corn, celery, lotus root, red onion, dried scallop, wolfberries, etc. I do not add salt or seasoning to the stock because the stock is very tasty due to the ingredients that I add to the stock. Remember to strain the stock before you portion out the stock and freeze them.

2. I prefer to buy the pork from the butcher in the wet market and ask the butcher to mince the pork for me. If you inform the butcher that you intend to feed the pork to a baby/toddler, the butcher will mince the pork twice so that it is more fine. I prefer not to buy ready-minced pork as these tend to contain fat.

Sunday, December 12, 2010

hearty green bean soup

The recipe for hearty green bean soup came from the mother of my friend, SC. Hi Aunt RL, thank you so much for sharing your recipe. It is easy to make and the green bean soup is delicious!

I have not included the respective quantities of the ingredients as it is up to personal preference.


INGREDIENTS

green beans
sweet potato (cubed)
dried longan
sago
rock sugar


METHOD

1. Add the green beans and water to a pot. Turn on the heat.

2. Place a steamer above the pot and use the steam from the boiling water to steam the sweet potatoes. When the sweet potatoes have softened, removed them and set them aside.

3. When the green beans have split and softened, add the sweet potatoes and dried longan. Also add the rock sugar to taste.

4. Turn off the heat when the dried longan has softened.

5. Ladle the green beans soup onto a bowl and add a spoonful of sago that has been soaked in water.

Friday, December 10, 2010

nutty lemon muffins

Muffins are easy to make. You are not required to whisk the batter and the preparation time is less than 10 minutes. As such, they are something that you can easily make when you come home from work. When you relax in front of the television after work, the aroma of the muffins being baked in the oven is tempting. Often, Da and I would not wait for the muffins to cool down thoroughly before we sample them.

If you have a grater at home, adding some grated orange or lemon zest would give oomph to your muffins. You do not even need to add orange juice or lemon juice to the muffin batter to give it flavour. The zest in itself makes the muffin very flavourful.

INGREDIENTS

1 1/2 cups plain flour
1 1/2 tsp baking powder
1/4 tsp ground cinnamon
1/4 tsp salt
6 tbsp butter (softened)
1 cup castor sugar
2 eggs (beaten)
1/2 cup milk
grated zest of 1 lemon
1/4 cup chopped nuts - I used a mixture of walnuts, pecans and pumpkin seeds

METHOD

1. Preheat the oven to 200 degrees celsius.

2. Line the muffin tray with paper muffin cups.

3. Sift the plain flour, baking powder, ground cinnamon and salt in a bowl. Set aside.

4. In another bowl, cream the butter, castor sugar and eggs until well blended.

5. Add the milk, lemon zest and chopped nuts. Mix well.

6. Fold in the flour mixture and stir until just blended. Do not over-stir. The mixture will be lumpy.

7. Spoon the batter into the muffin cups, filling them about 3/4 full.

8. Bake for 18 minutes or until a skewer inserted in the middle of the muffins comes out clean.

Wednesday, December 8, 2010

walnut cake

All these years, whenever I bake cakes, I have always used Self-Raising Flour. It is important to sift the flour before you add it to the rest of your batter. Self-Raising Flour is suitable to bake cakes such as banana cake.

A while ago, my friend SY informed me that she uses Top Flour to bake her cakes. Top Flour is suitable to bake cakes such as chiffon cakes or Christmas log cakes.

In December 2008, I bought a packet of Cake Flour. I had actually intended to bake a cheesecake using the Cake Flour. However, I changed my mind on the Eve of Christmas Eve in 2008. I decided to bake a walnut cake to bring to my office to share with my colleagues on Christmas Eve. Cake Flour is suitable to bake cakes that are more dense, such as pound cakes.

As the walnut cake that I made actually comprises several layers (baked together), it would be easier to use a greased and lined springform pan or a loose bottom pan. For the walnut cake that I baked, I used a 9" springform pan. The cake was not as high as I would have liked it to be. As such, it would be better to use an 8" springform or loose bottom pan instead.


Ingredients (for the walnut mixture)

150g digestive biscuits (crushed)
50g light brown sugar
80g walnuts (lightly roasted and chopped coarsely / crushed)
1/2 tsp ground cinnamon
1 tsp 3-in-1 instant coffee powder
50g butter (cold)

Ingredients (cake)

200g cake flour
1 tsp baking powder
150g butter (softened)
50g brown sugar
50g castor sugar
1/2 tsp vanilla extract
1/2 tsp ground cinnamon
a pinch of salt
1 tbsp ground almond
2 eggs
150g plain yoghurt

Method

1. Grease the bottom and sides of a springform or loose bottom pan with margarine or butter. Line the bottom and sides of the pan with baking paper.

2. Place the walnuts on a baking tray and bake at 160 degrees celsius for 15 minutes. Let the walnuts cool slightly before using a walnut crusher to crush the walnuts. Alternatively, you can use a rolling pin to coarsely crush the walnuts.

3. Crush the digestive biscuits in a mixing bowl and add the light brown sugar, crushed walnuts, ground cinnamon and instant coffee powder. Mix well.

4. Using your finger tips, rub in the cold butter until the mixture becomes crumbly. Set aside.

5. Sift the cake flour and baking powder. Set aside.

6. Beat the softened butter with the brown sugar and the castor sugar until the batter becomes pale and creamy. You can either use a manual whisk or electric mixer.

7. Add the vanilla extract, salt, ground cinnamon and ground almond. Mix well.

8. With a spatula, stir in the cake flour / baking powder mixture. Stir until the flour mixture is fully mixed with the batter. (Note: the batter will be quite thick and firm.)

9. Add 1/2 the yoghurt and mix. Add the remaining yoghurt and mix until the batter becomes smooth and has "spreadable" consistency.

10. Add 1/3 of the walnut mixture to the baking pan. Spread evenly and press firmly to the bottom of the pan using your palm and fingers.

11. Add half of the cake batter and spread evenly with a spatula. Sprinkle the top of the cake batter evenly with 1/3 of the walnut mixture.

12. Add the remaining cake mixture and spread evenly. Sprinkle the top of the cake batter evenly with the remaining walnut mixture.

13. Bake in a pre-heated oven at 170 degrees celsius for 1 hour or until a toothpick inserted in the centre of the cake comes out clean.

14. Remove the cake from the oven and let the cake cool thoroughly before slicing the cake.

Tip

If you do not intend to eat the cake on the day that you bake it, you can refrigerate the cake. However, do let the cake return to room temperature before serving.
Blog Widget by LinkWithin