Monday, August 31, 2009

chocolate cheesecake

Doesn't the photograph above look tempting? *grin*

This chocolate cheesecake is very easy to make, trust me! The more tricky aspect to slice the cheesecake evenly. The trick, according to Da's niece, is to freeze the cheesecake and cut the cheesecake cake using a hot knife. It seems that this is the way to cut an ice-cream cake as well.

You could, of course, make the biscuit base from scratch using 227g digestive biscuits and 115g butter. For this, you will need a 9" loose-bottomed tin. Put the biscuits in a plastic bag and bash them with a rolling pin until they are finely crushed. Melt the butter (in a microwave oven or a saucepan) and add the biscuit crumb, mixing well so that all are nicely coated. Press the mixture into the base of the tin. Flatten it down and make sure that the base is evenly covered, taking the mixture up the sides just a little.

Alternatively, you can do what I did - buy 2 Ready Crusts. The recipe below is sufficient for 2 cheesecakes, so if you only intend to make 1 cheesecake, simply halve the recipe.

Ingredients

700g cheese (mixture of cream cheese and cottage cheese)
100g chocolate biscuits (crushed) (I used whatever chocolate biscuits I found in the refrigerator when I made the cheesecake, which in this case were oreos and tim tams)
227g castor sugar
3 eggs
1 tsp vanilla essence

Method

1. Preheat the oven to 150 degrees celsius.

2. Whisk the cheese, chocolate biscuits, eggs, sugar and vanilla essence until you have a smooth mixture. If you use cottage cheese, the mixture may be a little lumpy - this will even out during the baking process.

3. Pour the mixture onto the biscuit base.

4. Bake at the middle shelf of the preheated oven for 45 minutes by which time there should just be a hint of wobble about the centre of the cheesecake. Turn the oven off, leaving the cheesecake inside to go completely cold. If you leave the oven door ajar during this time, your cake will have a creamier, less dry centre. It also helps prevent cracks forming.

5. Refrigerate for at least 2 hours before removing the cheesecake from the tin.

6. If you add topping to the cheesecake, refrigerate for 8 hours before eating.

7. Serve with fresh strawberries.

Topping (Option A)

Cover the cheesecake with a layer of *whipped cream and fresh fruit (slices of kiwi, peaches, grapes, strawberries, etc).

* As whipping cream tends to be sold in 1 litre packets, you can whip the entire packet and save the unused whipped cream to be added to your coffee.

To whip the whipping cream, whisk the whipping cream at the highest speed until soft peaks form (do not overwhip - underwhipped would be desirable). Add 2 tbsp of sugar and finish whipping by hand.


Topping (Option B)

Mix 200ml sour cream, 1 tbsp castor sugar and 2 tsp lemon juice and spread over the cheesecake.

Sunday, August 30, 2009

mocca marble cake

I have still not gotten the hang of creating the marbling effect when I bake cakes. As with everything else that we do, it is all a matter of practice, practice, practice.

If you too have difficulty creating the marbling effect when baking cakes, do not let it stop you from baking this mocca marble cake. Despite the not very marbled look of the cake that you see in this post (which is due to my lack of skill and is not the fault of the recipe), the cake is delicious.

INGREDIENTS

2 cups cake flour
1 tsp baking powder
1/2 tsp bicarbonate of soda
1/2 tsp salt
1/3 cup brown sugar
1/3 cup cocoa powder (sifted)
20g instant 3-in-1 coffee (I used hazelnut flavoured white coffee)
1/4 cup hot water
6 tbsp butter (softened)
1 cup castor sugar
1 egg and 1 egg white (beaten)
1 cup plain yoghurt

METHOD

1. Preheat the oven to 180 degrees celsius.

2. Grease and flour a bundt pan. Set aside.

3. Sift the cake flour, baking powder, bicarbonate of soda and salt in a bowl. Set aside.

4. Mix the brown sugar, cocoa powder, instant coffee and hot water in a small bowl until smooth.

5. Beat the butter in a mixing bowl using an electric mixer for 1 minute or until creamy. Add the castor sugar slowly and beat at high speed for 3 minutes. Add the eggs and beat for 2 minutes.

6. With the electric mixer at low speed, add the flour mixture and the yoghurt alternately, beginning and ending with the flour mixture. When the batter has been well blended, scoop out 1 1/2 cups of the batter and stir into the mocca mix.

7. Spoon 3/4 of the white batter into the bottom of the prepared pan. Spoon dollops of the mocca batter and then small dollops of the white batter over the mocca batter. Draw a small knife through the batter in zigzag motion to create a marbling effect.

8. Bake for 45 minutes or until a skewer inserted in the middle of the cake comes out clean.

Saturday, August 29, 2009

chocolate cake

From time to time, requests have been made to me for my chocolate cake recipe.

Well, I do not wish to claim credit. The recipe actually came from my mother’s eldest sister. I merely improvised her recipe and er... made the cake more irresistible (haha... self-praise!).

So, to all of you out there who have been waiting for the recipe, here goes....

INGREDIENTS

1 cup castor sugar
½ cup milk
1 ¼ cups self-raising flour
2 tbsp Hersheys cocoa powder
2 tbsp Milo powder
250g softened butter
1 tsp vanilla essence
2 eggs
1/3 cup cooking oil
a few dashes of ground cinnamon
ground almond
chopped peanuts
mixed fruits and/or raisins

METHOD

1. Dissolve the castor sugar and the milk together in a mixing bowl.

2. Add the other ingredients and beat using an electric mixer until well blended.

3. Spoon into a greased tin pan and bake at 180 degrees celsius for 30 to 40 minutes.

TIPS

1. At times when I have run out of castor sugar, I have used fine sugar to make the cake. It works just as well.

2. You can use fresh milk / low fat milk. Naturally, the richer the milk, the richer the cake.

3. It would be preferable to sieve the flour and cocoa powder, especially if you have had them for some time. Otherwise, the mixture may be too lumpy.

4. You can use other brands of cocoa powder but I have tried several brands and still find that Hersheys makes the best cocoa powder and chocolate chips.

5. Although you can substitute butter with margarine, I find that a cake made using butter is more flavourful. Be sure to use a good brand of butter, eg. SCS.

6. Do not use cold eggs. If your eggs have been stored in the refrigerator, leave them on your kitchen top at room temperature for awhile before you mix the eggs. Some cookbooks advise you to beat the eggs 1 at a time to prevent curdling. You can do that when making this cake but if you add both eggs in at the same time, it should be fine as well. The more important thing is that the eggs should not be cold when mixed.

7. You can use any type of cooking oil. However, I prefer groundnut oil as it makes the cake more flavourful.

8. In addition to greasing the tin (with oil or butter/margarine), I usually either sprinkle the inside of the cake pan with flour (if I am using the disposable 8 inch square pan) or line the inside of the cake pan with baking paper (if I am using the non-disposable 9 inch square pan).

9. Depending on the age and size of your oven, you may need to adjust the baking time.

Friday, August 28, 2009

cranberry and blueberry muffins

I came across a recipe for french blueberry muffins in Aunty Yochana's blog. I have been wanting to try the recipe for some time. However, as I did not have a digital scale (as the recipe requires, for example, 8 g of baking powder), I held back until I bought a digital scale.

Although I had sufficient fresh blueberries in my refrigerator to follow the recipe exactly, I decided to make some variations to the recipe as I had some cranberries in our refrigerator (which I had intended to use to bake bread but I did not need that many cranberries for my bread). Also, I like to add ground cinnamon to cakes and muffins to give them a lovely aroma.

The muffins were indeed very moist. I did not wait till they had fully cooled down before I sliced a muffin into two (for purposes of taking a photograph for my blog) and I savoured every bite of my half a muffin. I saved the other half for Da.

The recipe in this post is as modified by me.

INGREDIENTS

225g plain flour
8g baking powder
3/4 tsp salt
1/4 tsp ground cinnamon
125g butter (softened)
75g eggs (I mixed one egg and one egg yolk and topped up with low fat milk to 75g in total)
150ml low fat milk
zest of 1 lemon
1/2 cup blueberries
1/2 cup cranberries

METHOD

1. Preheat the oven to 180 degrees celsius.

2. Line the muffin pan with paper muffin cups. Set aside.

3. Sift the plain flour, baking powder, salt and ground cinnamon in a bowl. Set aside.

4. Beat the butter, eggs, milk and lemon zest in a bowl using an electric mixer until combined.

5. Add the wet ingredients to the dry ingredients and mix until almost blended. Do not overmix.

6. Add the cranberries and blueberries to the batter and stir until just combined. Do not overstir else the blueberries will smash up.

7. Spoon the batter into the muffin pans until 3/4 cup full.

8. Bake for 20 minutes or until a skewer inserted in the middle of the muffin comes out clean.

Thursday, August 27, 2009

carrot cake pudding with pudding sauce

I have ever sampled bread pudding at buffets. They can be served hot, cold or warm and are best eaten with a pudding sauce (which can also be served hot or cold).

Cake puddings are similar to bread pudding, the difference being the amount of sugar and spices used. If you were to use a cake as a base for the pudding, you would naturally need to add less sugar and spices to the pudding as the cake in itself is already sweet.

Here is a simple recipe for a carrot cake pudding. By "carrot cake", I am referring to the cake type of carrot cake and not the Chinese version of "cai tau kueh".

Ingredients (carrot cake pudding)

enough carrot cake (sliced about 1 to 1 1/2 cm thick) to fill the bottom of a 9" square cake pan 1 1/2 cups grated apple
1/2 cup chopped dry fruit
1/2 cup chopped nuts
3 cups milk
3 eggs
2 tbsp brown sugar
1/2 tsp salt
1/2 tsp ground cinnamon
juice of 1/2 a lemon

Method (carrot cake pudding)

1. Grease a 9" square cake pan and line with greaseproof paper.

2. Fill the entire bottom of the cake pan with a layer of the carrot cake. Top the cake with a layer of the grated apple.

3. Sprinkle the chopped nuts above the cake.

4. Sprinkle the chopped dry fruit above the chopped nuts.

5. Beat the milk, eggs, brown sugar, salt, ground cinnamon and lemon juice thoroughly and pour the mixture into the cake pan, making sure that the cake, nuts and dry fruit are covered.

6. Bake at 175 degrees celsius for 1 hour.

7. Serve with a generous serving of pudding sauce.

The carrot cake pudding can be served hot, warm or cold.

Ingredients (pudding sauce)

2 cups sugar
1 cup butter
2 tsp ground cinnamon
2 eggs
2 teacup milk


Method (pudding sauce)

1. Cream the sugar and butter.

2. Add the ground cinnamon and eggs.

3. Boil the milk and turn it, boiling hot, over the mixture smoothly, stirring all the time. This will cook the eggs smoothly.

The pudding sauce can be served hot or cold.

Wednesday, August 26, 2009

walnut biscotti

I took a big risk when I baked these walnut biscotti. Ordinarily, biscotti is made using plain flour. However, I did not have any plain flour left and the amount of plain wheat flour that I had was not sufficient. I had a little cake flour left (which was not sufficient to bake a cake either).

Taking a leap of faith, I used a mixture of plain wheat flour and cake flour to bake the walnut biscotti. I guess I had the last laugh when the biscotti turned out delicious. Phew!

INGREDIENTS

1 1/2 cups plain wheat flour
1/2 cup cake flour
1/8 tsp salt
1/4 tsp bicarbonate of soda
2 eggs
1 cup castor sugar
1 tsp vanilla essence
1 cup whole walnuts

METHOD

1. Place the whole walnuts on a baking tray. Toast the walnuts at 160 degrees celsius for 5 minutes. Leave to cool.

2. Sift the plain wheat flour, cake flour, salt and bicarbonate of soda in a bowl. Set aside.

3. Mix the eggs and castor sugar in a mixing bowl using an electric mixer until combined. Add the vanilla essence.

4. Fold in the flour mixture using a wooden spatula and mix until a dough is formed. Add the toasted walnuts and mix well.

5. Using floured hands, divide the dough into half. Turn the dough onto a floured board and roll each half into a log using floured hands. (Note: if the dough is too soft and sticky for you to handle, you may want to place it in the refrigerator for a while to harden the dough before you handle it. For me, I generously floured the board, my hands and the dough before I rolled out the dough using floured hands without hardening the dough in the refrigerator.)

6. Place the logs on a baking tray that has been lined with baking paper, spacing the logs at least 3" apart. Bake in an oven preheated to 180 degrees celsius for 35 minutes or until light brown.

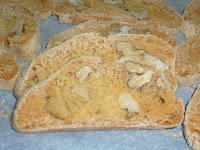
7. Remove the tray from the oven and let the logs cool for 10 minutes. Place the logs onto a cutting board and use a serrated knife to slice the logs into 1" thick.

8. Place each slice (cross-section facing upwards) on a baking tray that has been lined with baking paper. Bake at 160 degrees celsius for 10 minutes, turn the slices over and bake for another 10 minutes or until light brown and crispy.

9. Let the biscotti cool thoroughly before storing them in an air-tight container.

TIP

If, like me, you do not have a sweet tooth, you may like to reduce the amount of castor sugar to your preference.

Tuesday, August 25, 2009

carrot cake

Whenever Da and I host a gathering at our home and I do the grocery shopping before the gathering, I tend to buy carrots. No matter what the theme of the gathering is, I seem to use carrots in my cooking. For example, I use carrots in the following dishes:-
(a) pasta
(b) lasagne
(c) curries
(d) stir-fried vegetables
(e) steam boat

I like the young carrots from Australia sold in a packet as they are generally sweet.

As such, I invariably end up with unused carrots after the party is over. Whenever this happens, I will try to make a carrot cake so as not to waste the unused carrots.

Set out below is one of my favourite recipes for carrot cakes. Not only is it easy to make, the inclusion of ground cinnamon in the recipe makes the cake very flavourful.

Ingredients

1 1/3 cups plain flour
1 1/2 tsp baking powder
1 1/2 tsp bicarbonate of soda
1 1/2 tsp ground cinnamon
1 cup castor sugar
1 cup peanut oil
3 eggs
1 1/2 cups grated raw carrots
1 cup chopped nuts
1/2 cup ground hazelnut
1/2 tsp salt

Method

1. Grease a 9 inch square cake pan and line with greaseproof paper.

2. Sift the plain flour, baking powder, bicarbonate of soda and ground cinnamon in a bowl and set aside.

3. In a large mixing bowl, beat the sugar and oil. Beat in the eggs, one at a time. Fold in the grated carrots, chopped nuts, ground hazelnut and salt.

4. Fold in the flour mixture and stir until mixed.

5. Pour the batter into the prepared cake pan.

6. Bake at 165 degrees celsius for 50 to 55 minutes or when a toothpick inserted in the centre of the cake comes out clean.

Monday, August 24, 2009

balsamic chicken thighs

One of the cookbooks that my mother borrowed from the public library is that of barbeque. I had a great time flipping through the cookbook, browsing the recipes.

I came across a simple recipe for barbequed herbed balsamic chicken breasts. When Da and I hosted a barbeque party at our home on 20 June 2009, I decided to adapt from the recipe as I did not have some of the ingredients stated in the recipe.

May I present to you... balsamic chicken thighs. Bon appetit!

INGREDIENTS

4 chicken thighs (deboned)
2 tbsp chopped garlic1 tsp dried mixed herbs
1/2 whole black peppercorn
1 tbsp dijon mustard
1 tbsp olive oil
4 tbsp balsamic vinegar
freshly ground sea salt (to taste)
freshly ground mixed peppercorn (to taste)

METHOD

1. Wash and drain the chicken thighs. Using a sharp knife, gently make slashes diagonally across the chicken thighs. Set aside.

2. In a mixing bowl, mix the rest of the ingredients together. Add the chicken thighs and mix well.

3. Cover the mixing bowl and leave to rest in the refrigerator for 2 hours.

4. Place the marinated chicken thighs in direct heat of the barbeque pit.

Sunday, August 23, 2009

pumpkin muffins

Pumpkin pie mixes are very versatile. You can, of course, use them to bake a traditional pumpkin pie. I believe that they can also be used to make a pumpkin version of Ji Zhoh (although I have yet to try this variation).

Alternatively, you may want to try baking pumpkin muffins. It would be nice if you were to sprinkle streusel topping on top of the muffins before baking them. Alternatively, you can do what I did - I crushed some fruit and grain cereal and mixed them with ground mixed spice. I then sprinkled a teaspoonful of the mixture on top of each muffin before I baked the muffins.

INGREDIENTS

4 cups cake mix (eg. carrot cake or butter cake but not chocolate cake)
1 cup raisins
2/3 cup instant oats
2/3 cup brown sugar
1 tsp ground cinnamon
850g pumpkin pie mix
2 eggs (beaten)
topping of your choice

METHOD

1. Preheat the oven to 200 degrees celsius.

2. Line the muffin pans with paper muffin cups.

3. Combine the cake mix, raisins, instant oats, brown sugar and ground cinnamon in a large mixing bowl.

4. Add the beaten eggs to the pumpkin pie mix in a medium bowl and mix well.

5. Add the pumpkin mixture to the flour mixture and stir until the flour mixture is just blended in. The batter will be lumpy.

6. Fill the paper muffin cups with the batter till 3/4 full.

7. Sprinkle each paper muffin cup with topping.

8. Bake at 180 degrees celsius for 15 minutes or until a skewer inserted in the middle of the muffin comes out clean.

9. Let the muffins cool thoroughly before storing them in an air-tight container.


TIP

For the streusel topping, combine 3 tbsp of plain flour, 3 tbsp castor sugar and 3/4 tsp ground cinnamon in a small bowl. Add 2 tbsp of cold butter and mix with the rest of the ingredients using your fingers until the mixture resembles bread crumbs.

Saturday, August 22, 2009

jelly cocktail

There is a dessert stall at the Bedok Interchange hawker centre that I have been patronising since 1985. I was in Secondary 1 (Grade 7) at that time and my school was (at that time) diagonally opposite the bus interchange.

One of the star items at this dessert stall is their jelly cocktail. The stallholder would add loquat to the jelly cocktail, something that I have so far not found in jelly cocktails sold elsewhere.

To date, this dessert stall is still in operation.

The beauty of jelly cocktail is that it is really up to personal preference as to what fruits to include in the cocktail.

For the jelly, I used instant agar-agar powder. It is fast and easy.

INGREDIENTS

1 packet of instant agar-agar powder
1 tsp orange konnyaku colouring
1 can mixed fruit cocktail
1 can sliced peaches
1 can lychees
1 can longan
several green limes (to taste)

METHOD

1. Make the agar-agar according to the instructions on the packet. Add 1 tsp of orange konnyaku colouring as the agar-agar is being cooked. Pour the cooked agar-agar into a 9" x 9" sq are cake pan. Leave to cool, then refrigerate until firm.

2. When the jelly has firmed, cut the jelly into bite-size pieces and add them to a large container.

3. Add all the canned fruits.

4. Squeeze in lime juice to taste.

5. Place the container in the refrigerator and serve when chilled.

Friday, August 21, 2009

mocca chocolate chip scones

If you are a fan of coffee and you like all food that is chocolately, you will like mocca chocolate chip scones.

The secret is to use a good brand of cocoa powder and chocolate chips. My favourite is Hersheys cocoa powder and Hersheys semi-sweet chocolate chips.

INGREDIENTS

2 cups plain flour
1/3 cup cocoa powder
4 tsp baking powder
1/2 tsp salt
1/4 tsp ground cinnamon
3 tbsp brown sugar
1/2 cup semi-sweet chocolate chips
1/3 cup olive oil
3/4 cup multi-grain milk (or any other milk of your choice but preferably not skimmed milk)
70 ml hazelnut flavoured white coffee (or any other instant milk coffee of your choice) (cooled)
cinnamon sugar (for topping)
cocoa powder (for topping)

METHOD

1. Preheat the oven to 200 degrees celsius.

2. Sift the plain flour, cocoa powder, baking powder, ground cinnamon and salt in a large mixing bowl. Stir in the brown sugar and chocolate chips. Mix well and set aside.

3. Mix the olive oil, milk and coffee in a separate mixing bowl.

4. Pour the oil mixture into the flour mixture. Mix until blended.

5. Using an ice-cream scoop, scoop the batter onto a baking tray lined with baking paper.

6. Press the dough down until it is about 1/2" thick.

7. Mix the cinnamon sugar and cocoa powder together and sprinkle onto the top of the scones.

8. Bake at 200 degrees celsius for 10 minutes.

9. Let the scones cool thoroughly before storing in an air-tight container.

TIP

Scones are best eaten warm. As such, it would be advisable to warm up the scones in an oven preheated to 140 degrees celsius for 5 minutes before eating.

Thursday, August 20, 2009

mixed fruit yoghurt ice cream

This recipe is adapted from a recipe for strawberry yoghurt ice cream that I came aross in Aunty Yochana's blog. I like to eat fresh strawberries but somehow strawberry milk, strawberry ice-cream, strawberry yoghurt, etc are not my cup of tea.

INGREDIENTS

300g fruits (cut into small pieces) - I used a mixture of peaches, fruit cocktail, lychees and longan
80g fine sugar
100g non-fat mixed berries yoghurt
200g non-diary whipping cream
1 tsp mango essence

METHOD

1. Blend the fruits and the sugar in a blender until it becomes puree.

2. Mix the yoghurt with the puree and blend until thoroughly mixed. Pour the fruit mixture into a container.

3. Whisk the non-diary whipping cream using a hand whisk until it is stiff. Fold it into the fruit mixture.

4. Add the mango essence and mix thoroughly.

5. Freeze the ice-cream overnight until it is firm.


TIPS

1. As I had additional fruits left over, I cut the balance fruits into small cubes and added them to the mixture when I added the mango essence.

2. When I served the ice-cream, I topped the ice-cream with:-
(a) fresh blueberries; and
(b) crushed Pepperidge Farm Orange Milano cookies.

Da had a bowl of this and when he had finished eating it, he said "gotta take some more".
Blog Widget by LinkWithin