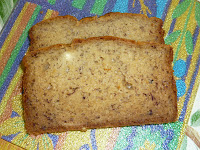
I am not posting any recipes here as there were too many recent bakes to count! But do enjoy the photographs below... :)
Friday, December 30, 2011
Wednesday, November 30, 2011
carrot and orange cake
The recipe in this post was adapted from a recipe that I found in The Australian Women's Weekly cookbook.
As it turned out, the cake was very moist and soft. In fact, it was so moist that I could not resist eating a slice even before the cake had thoroughly cooled down.
I used an 8" x 5" loaf pan. If, however, you prefer a higher loaf, do use a slightly smaller loaf pan.
INGREDIENTS
1 cup self-raising flour
1 tsp ground nutmeg
1 tsp ground mixed spice
125g butter (softened)
grated rind of 1 orange
1/2 cup castor sugar
2 eggs
1 cup raisins
1 large carrot (grated)
2 tbsp orange juice
METHOD
1. Preheat the oven to 160 degrees celsius.
2. Grease and line an 8" x 5" loaf pan with baking paper. Set aside.
3. Sift the self-raising flour, ground nutmeg and ground mixed spice in a bowl. Set aside.
4. Cream the butter, orange rind and castor sugar in a mixing bowl using an electric mixer until light and fluffy. Add the eggs, 1 at a time, beating well with each addition. Add the raisins, grated carrot and orange juice and mix well.
5. Fold in the flour mixture using a wooden spatula and mix until well blended.
6. Pour the batter into the prepared pan and bake for 1 1/2 hours or until a skewer inserted in the middle of the cake comes out clean.
Monday, November 28, 2011
milo muffins
This is another of my experiments in my quest to come up with simple recipes that Da's and my god-children (the eldest of whom is 9 years old and the youngest of whom is 4 years old) can have fun trying. The beauty about baking with the aid of little pairs of hands is that the little ones are eager to help and they enjoy the team effort.
I baked these muffins when Da and I came home from dinner around 11 pm on a weeknight. Although we had already eaten our dinner, I could not resist eating half of a muffin when it was still warm from the oven. I saved the other half for Da (who had by then fallen asleep). The rest of the muffins were packed in containers for Da and I to bring to our respective offices to share with our respective colleagues.
You can use a hand whisk instead of an electric mixer. However, lately my electric mixer has been placed on our kitchen counter-top (instead of being stored in the cupboard and taken out only when I need to use it). As such, it is convenient for me to use the electric mixer because my electric mixer comes with a stand and I can do other chores while the electric mixer is in use. Ah... the luxury of multi-tasking.
INGREDIENTS
270g self-raising flour
30g Milo
1 tsp baking powder
50g butter (softened)
80g brown sugar
200g semi-sweet chocolate chips
2 eggs (lightly beaten)
225 ml low-fat milk
1 tsp vanilla essence
METHOD
1. Preheat the oven to 180 degrees celsius.
2. Line the muffin pans with muffin cups.
3. Sift the self-raising flour, Milo and baking powder in a large bowl. Set aside.
4. Cream the butter and sugar in a mixing bowl using an electric mixer or a hand whisk until light and fluffy. Add the eggs, milk and vanilla essence and mix well. Stir in the chocolate chips.
5. Pour the wet ingredients into the flour mixture. Mix until just blended. Do not overmix. The batter will be lumpy.
6. Spoon the batter into the prepared muffin pan and bake for 20 minutes or until a skewer inserted in the middle of the muffin comes out clean.
Saturday, November 26, 2011
pumpkin seed and banana bread
When I made this loaf of pumpkin seed and banana bread, the dough rose so much that I had to use a 10" x 7" loaf pan instead of my usual 8" x 5" loaf pan. Alternatively, you may like to use two smaller loaf pans (eg. two 8" x 4" loaf pans) if you do not want a large loaf of bread.
Due to the inclusion of yoghurt in the dough, the bread remained soft even on the 3rd day without refrigeration.
INGREDIENTS
200g plain yoghurt
1/2 cup low fat milk
2 1/2 tbsp castor sugar
1/2 tsp salt
1 egg (lightly beaten)
2 tbsp butter (softened)
1 large overripe banana (mashed)
1/4 cup pumpkin seeds (crushed)
4 cups bread flour
2 1/2 tsp instant dry yeast
METHOD
2. Add the bread flour, making sure that the wet ingredients are totally covered.
3. Add the yeast.
4. Place the bucket in the breadmaker machine and set to "dough" cycle. Start the cycle.
5. When the cycle has been completed, turn the dough onto a floured board. Using floured hands, knead the dough about 5 times.
6. Place the dough in a 10" x 7" loaf pan that has been greased and lined with baking paper. Spread out the dough.
7. Cover the loaf pan with a damp cloth and leave for 1 hour or until the dough has doubled in size.
8. Bake in an oven preheated to 180 degrees celsius for 35 minutes.
INGREDIENTS
200g plain yoghurt
1/2 cup low fat milk
2 1/2 tbsp castor sugar
1/2 tsp salt
1 egg (lightly beaten)
2 tbsp butter (softened)
1 large overripe banana (mashed)
1/4 cup pumpkin seeds (crushed)
4 cups bread flour
2 1/2 tsp instant dry yeast
METHOD
1. Place all the ingredients (except the bread flour and the yeast) in the bucket of the breadmaker machine.
2. Add the bread flour, making sure that the wet ingredients are totally covered.
3. Add the yeast.
4. Place the bucket in the breadmaker machine and set to "dough" cycle. Start the cycle.
5. When the cycle has been completed, turn the dough onto a floured board. Using floured hands, knead the dough about 5 times.
6. Place the dough in a 10" x 7" loaf pan that has been greased and lined with baking paper. Spread out the dough.
7. Cover the loaf pan with a damp cloth and leave for 1 hour or until the dough has doubled in size.
8. Bake in an oven preheated to 180 degrees celsius for 35 minutes.
Thursday, November 24, 2011
sour cream banana cake
This is the first time that I have used sour cream in my cake batter. I was initially concerned that the inclusion of sour cream would make the cake, well... sour. However, not only was the cake not sour, it was extremely moist and I could not resist sampling a slice of the cake even before it cooled down.
If you happen to have some balance sour cream in the refrigerator, do give this recipe a try. You do not need a lot of sour cream - you only need 3/4 cup sour cream.
A word of "caution" though... this cake is very moist. As such, do not slice the cake too thinly else the cake may break into pieces easily.
1 1/2 cups self-raising flour
1 tsp bicarbonate of soda
1/4 tsp ground mixed spice
3/4 cup sour cream (softened)
1 tbsp low fat milk
125g butter (softened)
3/4 cup brown sugar
2 eggs
3 large bananas (mashed)
METHOD
1. Preheat the oven to 180 degrees celsius.
2. Grease an 8" x 5" loaf pan and line with baking paper. Set aside.
3. Sift the self-raising flour, bicarbonate of soda and ground mixed spice in a bowl. Set aside.
4. Mix the sour cream and milk in a bowl. Set aside.
5. Cream the butter and sugar in a mixing bowl using an electric mixer until light and fluffy. Add the eggs, 1 at a time, mixing well with each addition of egg. Add the bananas and mix well.
6. Fold in half the flour mixture and add half the sour cream / milk mixture. Mix well using a wooden spatula. Repeat using the balance flour mixture and balance sour cream / milk mixture.
7. Pour the batter into the prepared pan.
8. Bake for 1 hour.
Tuesday, November 22, 2011
peanut butter loaf
The recipe in this post is a modification of a recipe that I came across in HHB's blog.
It may be due to the age of my breadmaker but I have noticed that when I use the breadmaker to make the bread from start to finish, the texture of the bread is not as soft as when I use only the "dough" cycle of the breadmaker machine and bake the bake in the oven. As such, nowadays I prefer to bake the bread in the oven after using my breadmaker to make the dough.
INGDEDIENTS
1 tbsp peanut oil
1 3/8 cups water
3 tbsp chunky peanut butter
1 tsp salt
2 tsp brown sugar
2 tbsp dried milk powder
1/4 tsp ground cinnamon
3 cups bread flour
2 tsp instant dry yeast
1. Place all the ingredients (except the bread flour and yeast) in the bucket of the breadmaker machine.
2. Add the bread flour, making sure that the wet ingredients are totally covered.
3. Add the yeast.
4. Place the bucket in the breadmaker machine and set to "dough" cycle. Start the cycle.
5. When the cycle has been completed, place the dough in an 8" x 5" loaf pan that has been greased and lined with baking paper. Spread out the dough in the loaf pan.
6. Cover the loaf pan with a damp cloth and leave for 1 hour or until the dough has doubled in size.
7. Bake in an oven preheated to 180 degrees for 45 minutes.
It may be due to the age of my breadmaker but I have noticed that when I use the breadmaker to make the bread from start to finish, the texture of the bread is not as soft as when I use only the "dough" cycle of the breadmaker machine and bake the bake in the oven. As such, nowadays I prefer to bake the bread in the oven after using my breadmaker to make the dough.
The other thing that you have to take note of when making bread is the yeast. I used to be unsuccessful with almost every loaf of bread that I made (regardless whether I used the breadmaker or not). When I switched to another brand of yeast, every loaf of bread was successfully made (except for the times when I got too carried away with modifying recipes or creating recipes and went overboard with the ingredients). I am not certain whether the problem lies with the brand of yeast that I used to use or the fact that the yeast was not fresh.
INGDEDIENTS
1 tbsp peanut oil
1 3/8 cups water
3 tbsp chunky peanut butter
1 tsp salt
2 tsp brown sugar
2 tbsp dried milk powder
1/4 tsp ground cinnamon
3 cups bread flour
2 tsp instant dry yeast
METHOD
1. Place all the ingredients (except the bread flour and yeast) in the bucket of the breadmaker machine.
2. Add the bread flour, making sure that the wet ingredients are totally covered.
3. Add the yeast.
4. Place the bucket in the breadmaker machine and set to "dough" cycle. Start the cycle.
5. When the cycle has been completed, place the dough in an 8" x 5" loaf pan that has been greased and lined with baking paper. Spread out the dough in the loaf pan.
6. Cover the loaf pan with a damp cloth and leave for 1 hour or until the dough has doubled in size.
7. Bake in an oven preheated to 180 degrees for 45 minutes.
Subscribe to:
Posts (Atom)