Wednesday, September 30, 2009

claypot chicken rice

I love eating claypot chicken rice. I think that many would agree with me when I say that the best part of the rice is... the burnt part. *grin*

My Uncle T who lives in Petaling Jaya, Malaysia swears by the Kampar claypot chicke rice. I finally had the opportunity to try the famous chicken rice in the earlier part of this year. UT is right! It's absolutely divine.

For those of you who are not able to make a trip to Kampar in Malaysia to try the famous Kampar claypot chicken rice, you may want to give the recipe below a try.


Ingredients

2 cups rice (washed and drained)
3 cups chicken stock
2 chicken breasts (cut into bite-sized pieces)
5 Chinese dried mushrooms (soaked and cut into half)
1 knob ginger (sliced thinly)
1 Chinese sausage (sliced)
salted fish (sliced thinly and fried till crispy)
1 tbsp dark soya sauce
4 tbsp garlic oil
Marinade
2 tbsp light soy sauce
2 tbsp oyster sauce
1 tbsp dark soy sauce
1 tbsp Hua Tao wine (ie. Chinese cooking wine)
1 tsp of ginger juice
1 tbsp sesame oil
½ tsp grated black peppercorn
1/2 tsp grated white peppercorn
½ tsp sugar
½ tbsp corn flour
Garnishing
Spring onion (chopped)
any green leafy vegetables of your choice (blanched)


Method

1. Mix chicken, dried mushrooms and sliced ginger with marinade and set aside for at least 30 minutes.

2. Put rice and chicken stock into a claypot, cover and bring to boil lower fire and cook with low heat for about 15 minutes till holes are formed on top.

3. Spread marinated chicken, dried mushrooms and Chinese sausage on top, cover and cook with low heat for about 15 minutes till the rice is dry and the chicken pieces are cooked.

4. Remove from the fire and sprinkle salted fish on top, cover and leave to stand for 10 minutes till rice is dry and fluffy.

5. Before serving, add the green leafy vegetables and sprinkle spring onion, black soya sauce and garlic oil, mix in to combine toppings and rice.


Tips

1. You can buy ginger juice from the supermarket. Alternatively, to make your own ginger juice, grate a knob of ginger and squeeze out the juice.

2. To make garlic oil, simply chop some garlic and fry with more oil than you would normally use to fry garlic.

Tuesday, September 29, 2009

yoghurt chocolate chip cookies

Another chocolate chip cookie recipe from Pebbles? Yes, but the recipe in this post is different. I usually bake crunchy chocolate chip cookies and it is popular with my family, friends and colleagues.

The recipe in this post is different. Not only does it not contain cocoa powder, it includes plain yoghurt. As such, the cookie is not as chocolatey but it smells and tastes heavenly just the same. Do give it a try!


Ingredients

1 3/4 cup plain flour
1/2 tsp bicarbonate of soda
1/2 tsp ground cinnamon
1/2 tsp ground almond
1/2 tsp salt
1/2 cup brown sugar
1/2 cup castor sugar
1/2 cup butter (softened)
1/2 cup plain yoghurt
2 tsp vanilla essence
1/2 cup semi-sweet chocolate chips
1/2 cup chopped almonds


Method

1. Preheat the oven to 190 degrees celsius.

2. Sift the plain flour, bicarbonate of soda, ground cinnamon, ground almond and salt in a bowl. Set aside.

3. In a large mixing bowl, cream the brown sugar, castor sugar and butter until light and fluffy. Stir in the yoghurt and vanilla essence. Add the chocolate chips and chopped almonds and mix well.

4. Fold in the flour mixture and stir until just combined.

5. Using two teaspoons, scoop a teaspoonful of the cookie dough and use the other teaspoon to place the dough onto a baking tray lined with baking paper.

6. Bake for 10 to 12 minutes or until the cookies are golden brown.

7. Let the cookies cool thoroughly before storing them in an air-tight container.

Monday, September 28, 2009

clam chowder stew

The next time that you open a can of clam chowder, do not just pour the contents into a saucepan, heat up the soup and then drink it.

Be innovative! Make the dish your own creation!

Whenever I open a can of clam chowder, I usually turn it into a stew. What this means is that I start out with a can of clam chowder but I use it merely as a base. What I would do is to add other ingredients to the clam chowder such as green capsicum, red capsicum, yellow capsicum, celery, chicken fillet, potato, carrots, green peas, chick peas and young corn. I would also add milk instead of water.

To thicken the stew, add grated mozarella cheese after the stew has boiled.

This stew goes very well with garlic bread. Instead of buying frozen garlic bread and heating it up in the oven, you may want to buy foccacia bread, slice it and spread garlic spread on it before you bake the garlic bread in a preheat oven at 180 degrees for 15 minutes.

Home cooking does not have to be a challenge nor a chore. It is all about being flexible and being innovative.

If you have not done much cooking in your life, you may want to start out slow using easy recipes that have been tried and tested by friends and relatives. You may also want to use little "aids" such as cooking the pasta sauce or stew in a slow cooker (crock pot) instead of using a pot and cooking it over a stove top.

The same applies for baking. When I first started baking in the mid 1980s, all my cakes would not rise. I reached a stage where I developed a phobia for baking cakes because every cake was doomed to failure. Later, I realised that it was all about patience, practice and picking up little tips from others. It also helped to obtain recipes from friends and loved ones who have tried and tested the recipes. Some of the recipes that you find in recipe books may require techniques and skills that you may not have developed yet.

If you are new at baking and cooking, do not lose heart. Practice makes perfect!

Sunday, September 27, 2009

bread caramel pudding

In the past, whenever I made bread pudding, I would simply slice the bread into small cubes and line the cubes at the bottom of the glass. I would then prepare a custard topping and pour it over the bread cubes.

This time, I decided to try something different. I cooked the bread cubes with milk until the mixture thickened. I then used a hand whisk and whisked the mixture until it was smooth and even. The result was a delicious and smooth pudding.

INGREDIENTS (pudding)

1 litre milk
4 slices of bread (cubed)
8 tbsp custard powder
4 tbsp water
10 tbsp brown sugar


INGREDIENTS (caramel topping)

8 tbsp castor sugar
1/2 cup milk
2 tbsp custard powder


INGREDIENTS (garnishing)

strawberries (sliced)
grapes (halved)


METHOD (pudding)
1. Slice the bread into small cubes.

2. Boil the milk on medium flame and add the bread.

3. When the milk has boiled, continue stirring for 15 minutes.

4. Add the sugar and stir until the sugar has dissolved.

5. Dissolve the custard powder in the water and add to the milk mixture, stirring constantly.

6. When the milk mixture has thickened, remove from the heat.

7. Using a hand whisk, whisk the pudding until it is smooth and even.

8. Ladle the pudding into wine glasses till about 3/4 full. Set aside to cool.


METHOD (caramel topping and garnishing)

1. Boil the milk and sugar over medium flame.

2. When the mixture has boiled, add the custard powder and continuously stir until evenly mixed.

3. Remove from the heat and drizzle the caramel topping over the pudding.

4. Decorate each pudding with a slice of strawberry and a slice of grape.

5. Refrigerate for 7 to 8 hours to set the pudding.

Saturday, September 26, 2009

chawanmushi

When Da and I hosted a Valentine's Day dinner at our home this year, the theme of the dinner was Japanese. As such, I decided to make chawanmushi for the dinner.

I searched the internet for chawanmushi recipes. However, I had difficulty selecting a recipe that suited me because some of the recipes contain ingredients that are not easily available at our local supermarket or are too complicated in steps. When I bake or cook, it is important to me that the baking or cooking process is simple. I work long hours and I only have the weekend to rest and to indulge in one of my favourite hobbies - cooking / baking.

In the end, I decided to improvise and create my own recipe. I made the chawanmushi for the Valentine's Day dinner and I was relieved that it turned out fine. The only regret is that Da and I were not able to find any chawanmushi cups when we browsed the shops on the night before Valentine's Day. As such, I had to make do with coffee cups. We shall have to extend our search for chawanmushi cups to shops in other locations.

In the meantime and as requested by SY, here is the recipe for my version of chawanmushi. I used miso soup for the stock. If you do not have miso soup on hand, please see my tips at the end of this post for alternatives.

This recipe serves four and you can vary the recipe accordingly if you are making fewer or more cups of chawanmushi.


Ingredients

Part A:
50g mushrooms (I used a mixture of dried mushrooms and a variety of fresh mushrooms) (sliced)
80g chicken fillet (sliced)
4 pieces of crab stick (sliced)
100 ml miso soup
dash of pepper
8 ginko nuts

Part B:
4 eggs
400ml miso soup
dash of pepper


Method

1. Scald the mushrooms, chicken and crab stick in 100ml of boiling miso soup. Sprinkle a dash of pepper and mix well.

2. Strain the ingredients and distribute them among the chawanmushi cups. Add 2 ginko nuts to each chawanmushi cup. Set aside.

3. Using a fork, lightly beat the eggs and mix with 400ml miso soup and a dash of pepper. Strain the mixture and pour the mixture into the chawanmushi cups. Skim off any bubbles that appear on top of the mixture.

4. Boil some water in a steamer. When the water has boiled, cover the chawanmushi cups with cling wrap and place the cups in the steamer. Steam for 20 minutes or until the chawanmushi has set.


Tips

If you do not have miso soup on hand:-

(1) For Part A, you can marinate the mushrooms, chicken and crab stick with some salt before lightly scalding them in boiling water.

(2) For Part B, you can substitute the miso soup with 400ml water, 1 tbsp concentrated meat stock (eg. chicken stock), 1/2 tsp sugar, 1/4 tsp light soya sauce and a pinch of salt.

Friday, September 25, 2009

jam bread

If the bread in the photograph above looks a bit purple to you, it is because I used blueberry and banana jam in the bread dough.

Although most of the jam was blended into the bread dough, there were small bits and pieces of blueberries that were still visible in the finished product.

INGREDIENTS

325 ml water
1 1/3 tsp salt
1 1/3 tsp castor sugar
2/3 cup jam
2 2/3 cup bread flour
1 13 cup wheat flour
2 1/2 tsp instant dry yeast

METHOD

1. Place all the ingredients except the bread flour, wheat flour and yeast in the bucket of the breadmaker machine.

2. Add the bread flour and wheat flour, making sure that the wet ingredients are totally covered.

3. Add the yeast.

4. Place the bucket in the breadmaker machine and set to "dough" cycle. Start the cycle.

5. When the dough cycle has been completed, turn the dough onto a floured board. With floured hands, knead the dough for another 5 minutes.

6. Place the dough in a 8" x 5" loaf pan that has been greased and lined with baking paper.

7. Bake in an oven preheated to 175 degrees celsius for 55 minutes.

8. Let the bread cool thoroughly before slicing.

Thursday, September 24, 2009

baked beans stew

Many of us would have eaten baked beans when we were children. Every now and then, I like to cook a dish using baked beans as the base.

The good thing about using baked beans as the base is that as the beans soften, they thicken the dish without the need to add any cornstarch.

Here is a simple recipe for a baked beans stew that is a sure winner with children and adults alike.


Ingredients

2 cloves garlic (chopped)
1 large red onion (chopped)
2 cans of baked beans
1 packet of crab sticks
5 dried mushrooms
1 can button mushrooms
1 small broccoli
4 stalks of celery
2 large potatoes (cut into cubes)
1 small packet of enoki mushrooms
1 large carrot
1 green capsicum
1 red capsicum
1 yellow capsicum
1 can young corn
100g chicken fillet (cut into bite sized pieces)
cooking sherry
worcestershire sauce
tomato sauce to taste
sugar to taste
bacon bits
dried herbs (eg. parsley, oregano, basil, rosemary, thyme, etc)
olive oil
water


Method

1. Marinade the chicken fillet with cooking sherry and worcestershire sauce. Set aside while preparing the rest of the stew.

2. Cut the crab sticks, dried mushrooms, button mushrooms, broccoli, celery, potatoes, enoki mushrooms, green capsicum, red capsicum, yellow capsicum and young corn into bite sized pieces.

3. In a large pot, fry the chopped garlic with olive oil. Add the chopped red onions and fry until soft.

4. Add the chicken fillet and fry lightly.

5. Add the chopped vegetables and stir-fry.

6. Pour in a bowl of water and cover the pot to let the stew cook.

7. When the vegetables have softened, add the baked beans.

8. Sprinkle with bacon bits and dried herbs.

9. Add tomato sauce and sugar to taste.

10. Bring the stew to a boil. Reduce the heat and simmer for 15 to 20 minutes.

Wednesday, September 23, 2009

peanut butter and chocolate chip bread

I was in a "chocolate chip" mood one day and I baked three types of bread / cookies at one go, all using chocolate chips as the base, that is, (a) yoghurt chocolate chip cookies, (b) chocolate bread and (c) peanut butter and chocolate chip bread.

If you are a peanut butter fan like me, I would recommend that you use the chunky type of peanut butter. It gives the bread "oomph".

INGREDIENTS

2 cups plain flour
4 tsp baking powder
1 tsp ground cinnamon
1 tsp instant coffee (that is, the 3-in-1 instant coffee)
1/2 cup sugar
1 tsp salt
1 1/2 cups milk
1/2 cup peanut butter
1/2 cup semi-sweet chocolate chips

METHOD

1. Preheat the oven to 195 degrees celsius.

2. Grease and flour the insides of two 8" x 4" x 3" loaf pans.

3. Sift the plain flour, baking powder, ground cinnamon and instant coffee in a large mixing bowl.

4. Add the sugar and salt and mix well.

5. Add the milk, peanut butter and chocolate chips and mix until combined.

6. Bake for 50 minutes or until a skewer inserted in the middle of the loaf comes out clean.

TIP

The bread has a cake-like texture and is extremely soft when it is hot. As such, do let the bread cool thoroughly before you slice it otherwise the bread may crumble.

Tuesday, September 22, 2009

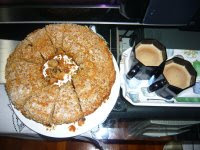
rosemary wine cake with walnuts and raisins

I came across the recipe for rosemary wine cake with currants in a health magazine. As it is a health magazine, the recipes inside the magazine are supposed to be healthy. In the case of the rosemary wine cake, the recipe requires only 3 tablespoonfuls of butter.

I have modified the recipe slightly as I was not able to find some of the ingredients at the supermarket.

Not to worry, despite the modification in the recipe, the cake turned out fine. If, however, you would like the cake taste more moist, you can omit the inclusion of the crushed walnuts in the cake mixture. Personally, I am fine with the inclusion of the crushed walnuts in the cake mixture.

In fact, this cake turned out so well that when I brought the cake to a dinner on Saturday, 25 October 2008, many of us who ate the cake had a 2nd helping!

Ingredients

1 1/2 cups self-raising flour
1/2 cup plain flour
1/2 tsp salt
1 1/2 tsp baking powder
3 tbsp butter (softened)
3/4 cup castor sugar
1/2 cup peanut oil
1 tsp grated lemon zest
1 tsp vanilla essence
dash of ground cinnamon
1 cup raisins
1/4 cup crushed walnuts
2 tsp dried rosemary leaves
3/4 cup sweet dessert wine


Topping

2 tbsp fine sugar
1/2 cup crushed walnuts

Method

1. Grease a bundt pan with butter/margarine and dust with flour.

2. Sift the flour, salt and baking powder.

3. In a large mixing bowl, beat the butter with the sugar.

4. Add the eggs, 1 at a time.

5. Add the oil, lemon zest, vanilla essence, ground cinnamon, raisins, crushed walnuts and rosemary leaves and mix well.

6. Stir in 1/2 of the flour mixture, then add 1/2 of the wine. Repeat using the remaining flour mixture and remaining wine, mixing just until smooth.

7. Pour the cake mixture into the prepared baking pan.

8. Sprinkle 1/2 of the fine sugar, then the crushed walnuts, then the remaining fine sugar.

9. Bake at 175 degrees celsius for 1 hour. The cake is done when a toothpick inserted into the cake comes out clean.

10. Let the cake cool thoroughly in the baking pan. If you have greased the pan and dusted the pan with flour, you should be able to remove the cake easily. If you have difficulty removing the cake, place the baking pan on top of a hot towel for a few minutes - you should then be able to remove the cake from the pan.

Tips

1. As pre-packed crushed walnuts are not easily available in the supermarket, to crush the walnuts, you can either:-
(a) hit the walnuts (in the packet) with a rolling pin;
(b) use a walnut crusher; or
(c) use a chopper/blender.

I prefer using a walnut crusher as the walnuts end up crushed but not ground. If you were to use a chopper/blender, the walnuts tend to end up ground. If you use a rolling pin, well, whether the walnuts end up crushed or ground depends on who you are thinking of as you are hitting the walnuts with the rolling pin.

2. If you do not have peanut oil, you can replace it with olive oil. The inclusion of oil makes the cake more moist. My aunt was the one who recommended using peanut oil instead of corn oil when baking cakes. I have found that peanut oil makes the cake very flavourful.

3. If you do not have sweet dessert wine, you can replace it with sweet red wine.

4. The cake goes well with a hot cup of coffee.

Monday, September 21, 2009

dinner rolls

I like to eat dinner rolls. They are aromatic and complement a bowl of hot stew. Dinner rolls are best eaten warm, so it would be a good idea to warm up the dinner roll in the oven before serving.
INGREDIENTS

1 cup warm water
3 tbsp castor sugar
1 tsp salt
1/4 cup dry milk powder
2 tbsp butter (softened)
3 cups bread flour
2 1/2 tsp instant dry yeast
1 egg white (for glazing)
2 tbsp water (for glazing)

METHOD

1. Place all the ingredients (except the bread flour, yeast and glazing) in the bucket of the breadmaker machine.

2. Add the bread flour, making sure that the wet ingredients are totally covered.

3. Add the yeast.

4. Place the bucket in the breadmaker machine and set to "dough" cycle. Start the cycle.

5. When the cycle has been completed, turn the dough onto a floured board. Using floured hands, knead the dough 5 times.

6. Separate the dough into 12 portions and shape each portion to preference.

7. Place the rolls on a baking tray lined with baking paper. Cover with a moist cloth and leave to rise for 1 hour or until the rolls have doubled in size.

8. Mix the egg white with 2 tbsp water and brush each roll with the glaze.

9. Bake in an oven preheated to 175 degrees celsius for 15 minutes.

10. Let the rolls cool thoroughly before storing.

TIP

As an alternative to an egg white and water glaze, I sometimes use milk to glaze the bread before baking.

Sunday, September 20, 2009

peach and kiwifruit cheesecake

I had earlier obtained from Tiki the recipe to her non-bake cheese cake.

After some modifications by me, I have come up with a peach and kiwi fruit cheese cake.

The cheesecake is not overly sweet and is popular with adults and children alike, unless, like Da's friend JK, you do not eat cheese and like my friend SC, you do not eat kiwi fruit, in which case, please admire the cheesecake from afar and imagine what it tastes like.... hehe!


Ingredients (base and filling)

400g sweet meal digestive biscuits
120g butter (softened)
1 1/2 tsp gelatin
100 ml hot water
1 tbsp lemon juicegrated lemon rind
250g Philadelphia cream cheese
4 tbsp condensed milk
1 tin evaporated milk (chilled)
1 can sliced peaches (cut into bite sized pieces)


Ingredients (topping)

2 kiwi fruits (cut into thin slices)
3 tbsp gelatin dissolved with some hot water

Method (base)

1. Crush the biscuits into crumbs in a mixing bowl.

2. Mix the biscuit crumbs with the melted butter.

3. Press the biscuit mixture into a 9" round banking pan to form a firm and even crust.

4. Leave the mixture in the refrigerator to chill while you make the filling.


Method (filling)

1. Dissolve 1 1/2 tsp gelatin with hot water. Stir in the lemon juice and the grated lemon rind.

2. In another mixing bowl, mix the cream cheese and condensed milk.

3. Whip the evaporated milk until thick. Add the gelatin mixture and the cheese mixture. Beat until the mixture is smooth.

4. Add the peaches to the mixture and mix well.

5. Pour the mixture into the crust and refrigerate.


Method (topping)

1. When the cheesecake has firmed up, decorate the top of the cheesecake with the sliced kiwi fruit.

2. Dissolve 3 tbsp of gelatin in hot water and pour over the top of the cheesecake. Make sure that the kiwi fruit is covered.

3. Refrigerate.


Tips

1. It would be easier if you were to use a baking pan with a removable base.

2. Line the baking pan (or if you are using a baking pan with a removable base, line the base) with aluminium foil.

3. For the lemon juice, you can either use fresh lemon juice (ie. by squeezing a lemon) or use the concentrated lemon juice.

4. To chill the evaporated milk, simply place the unopened tin of evaporated milk in the freezer while you are preparing the base and the filling.

5. If you were to freeze the cheesecake after you have made it, the gelatin tends not to soften after you remove the cheesecake from the freezer (although the cream cheese will soften). The advantage is that the cheesecake will end up tasting like ice cream. The disadvantage is that it becomes very difficult to cut the cheesecake. One solution is to dip your knife in hot water and wipe the knife dry before you cut the cheesecake. Using a hot knife makes it easier to cut a frozen cheesecake.

Saturday, September 19, 2009

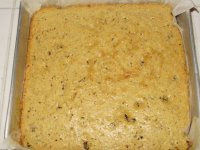
rosemary and cheese bread

If you like herbs in your bread, you may want to try your hand at baking rosemary and cheese bread. The aromatic smell of the herbs when the bread is baking in the oven is simply heavenly.

This bread is similar to the focaccia. The difference is that there is grated parmesan cheese included in this bread.

INGREDIENTS

1 cup water
3 tbsp olive oil
2 tsp brown sugar
1 1/2 tsp salt
1/4 tsp dried Italian herbs
1 tbsp dried rosemary leaves
1/4 tsp dried thyme leaves
1/4 tsp ground black pepper
1/4 cup grated parmesan cheese
2 1/2 cups bread flour
2 tsp active dry yeast

METHOD

1. Place all the ingredients (except the bread flour and the yeast) in the bucket of the breadmaker machine.

2. Add the bread flour, making sure that the wet ingredients are totally covered by the bread flour.

3. Add the yeast.

4. Place the bucket in the breadmaker machine and select "dough" cycle. Start the cycle.

5. When the cycle has been completed, turn the dough onto a floured board. Using floured hands, knead the dough for another 5 times.

6. Place the dough in a 7" x 10" loaf pan that has been greased and lined with baking paper. Spread out the dough in the loaf pan evenly.

7. Cover the loaf pan with a damp cloth and leave for 1 hour.

8. Bake at 180 degrees celsius for 35 minutes.

Friday, September 18, 2009

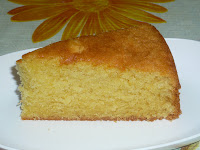
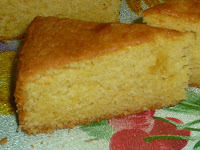
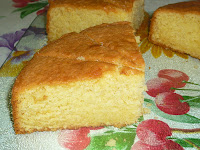
moist butter cake

When the drink stall lady at my family's favourite coffee shop at Jalan Tua Kong asked me for a recipe for butter cake, I readily agreed.

The day before our next family lunch at the coffee shop, I decided to bake the butter cake so that I could let the drink stall lady sample a slice.

This recipe yields a very buttery and moist butter cake. If you like butter cakes, you will like this recipe.

When you bake butter cakes, it is important to use good quality butter. Also, the taste would not be the same if you were to substitute butter with margarine. I use SCS butter whenever I am baking butter cakes.

When I baked this cake, our friends (WC and SC) were at our home. WC was eyeing the cake as it was cooling on the rack and he said that he could not wait to sample the cake.

After WC had eaten a slice of the cake, he gave the thumbs up and commented that he had used up his entire year's quota of butter consumption! *grin*

INGREDIENTS

180g self-raising flour
250g butter (softened)
110g castor sugar
4 eggs
1 tsp vanilla essence

METHOD

1. Preheat the oven to 180 degrees celsius.

2. Grease and line the bottom of an 8" round cake pan with baking paper. Grease and flour the sides of the cake pan. Set aside.

3. Sift the self-raising flour in a bowl. Set aside.

4. Cream the butter and sugar in a mixing bowl using an electric mixer until light and fluffy.

5. Add the eggs, one at a time, beating well with each addition.

6. Add the vanilla essence and mix well.

7. Fold in the flour using a wooden spatula.

8. Pour the batter into the prepared pan and bake for 45 minutes or until a skewer inserted in the middle of the cake comes out clean.

Thursday, September 17, 2009

satay chicken buns

It has been some time since I last made bread buns. In the past, I had some difficulty with the filling in that when I thought that I added enough filling, it turned out to be insufficient and furthermore, the filling ended up at one end of the bun.

When I made these satay chicken buns, I decided to do some trial and error in the way I shaped the bun. After separating the bread dough into small portions, I rolled out each portion, added the filling, rolled up the dough and finally shaped into a round bun. The end result was better than my previous attempts but I guess the age-old saying holds true - practice makes perfect.

INGREDIENTS

1/2 cup warm milk
1/4 cup butter (softened)
1/8 cup castor sugar
1 egg (lightly beaten)
3/4 tsp salt
2 cups bread flour
1 1/8 tsp instant dry yeast
1 can of satay chicken
1 egg (mixed with 2 tsp water and beaten) - egg wash

METHOD

1. Place all the ingredients (except the bread flour, yeast, satay chicken and egg wash) in the bucket of the breadmaker machine.

2. Add the bread flour, making sure that the wet ingredients are totally covered.

3. Add the yeast.

4. Place the bucket in the breadmaker machine and set to "dough" cycle. Start the cycle.

5. When the cycle has been completed, turn the dough onto a floured board. Using floured hands, knead the dough about 5 times before separating the dough into 6 portions.

6. Pour the contents of the can into a bowl and mix the satay chicken using a fork. Remember to remove any bones.

7. Roll out each portion of the dough and fill with 1/6 of the satay chicken filling. Roll up the dough and shape into a round bun.

8. Place each shaped potion on a baking tray that has been lined with baking paper.

9. Cover the baking tray with a dry cloth and leave for 1 hour or until the dough has doubled in size.

10. When the dough has doubled in size, brush with the egg wash and bake in an oven preheated to 190 degrees celsius for 20 minutes.

Wednesday, September 16, 2009

orange prune cake

A prune is any of various plum species, mostly Prunus domesticus or European Plum (commonly referred to as a Sugar Plum). They are usually sold as dried fruit. Fresh plums that are marketed as "prunes" have an oval shape and a more easily removed pit. The dried fruit is wrinkly in texture, and chewy on the inside.

Prunes are used in cooking both sweet and savory dishes. Stewed prunes are a dessert. Prunes are a frequent ingredient in North African tagines. Prunes are used frequently in Tzimmes, a traditional Jewish dish in which the principal ingredient is diced or sliced carrots; and in traditional Norwegian fruktsuppe.

Prune juice is made by softening prunes through steaming and then putting them through a pulper to create a watery puree. Prunes and their "juice" contain the natural laxative dihydrophenylisatin. Prunes also contain dietary fiber (about 7%, or 0.7g per prune). Prunes and prune juice are thus common home remedies for constipation. Prunes also have a high antioxidant content.

I like to buy pitted prunes. I use them in a variety of ways:-
(a) eat them on their own
(b) add them to cereal
(c) add them to a plate of cut fruits
(d) use them to make prune cake

Set out below is a recipe for orange prune cake. The preparation time appears to be long because of the time taken to chop the prunes and to grate the rind of the oranges. Other than this, this is an easy recipe and you can taste the flavour of the orange very clearly in the baked cake.


Ingredients

250g butter
210g castor sugar
grated rind of 2 oranges (only the orange-coloured part of the peel)
1 tsp vanilla essence
1 tbsp ground hazelnut
4 eggs
270g self-raising flour (sifted)
1 1/2 tsp ground cinnamon (sifted)
3 tbsp lukewarm water
120g dried prunes, pitted and chopped

Method

1. Grease a 9 inch square cake tin and line with greaseproof paper.

2. Cream butter and sugar till light and fluffy, then add orange rind, vanilla essence and ground hazelnut.

3. Add the eggs, one at a time, beating well after each addition.

4. Fold in the sifted flour and ground cinnamon a little at a time and stir in the water.

5. Add the chopped prunes.

6. Pour the batter into the prepared tin and bake on the centre shelf of the oven for 1 hour.

Tips

1. You can use margarine instead of butter. However, the use of butter makes the cake more flavourful.

2. You can use fine sugar instead of castor sugar.

3. I once used orange juice (since I had already grated the orange rind, I thought that I might as well make use of the juice from the orange) instead of lukewarm water. The cake turned out fine as well.

Comment

I once used top flour instead of self-raising flour to bake the cake. I had never used top flour before. The cake did not turn out as moist as the previous times that I baked the cake using self-raising flour. I am not sure whether this was due to the substitution of the type of flour or the fact that I added an additional egg yolk (I had steamed an egg white with rock sugar in a double-boiler - according to Tiki, this works wonders to make one's vocal cords smooth, so I ended up with an additional egg yolk and I did not know what else to do with the yolk so I added it to the prune cake batter). However, this just goes to show that when you bake cakes, it is best to follow the recipe as closely as possible unless you know how to modify the recipe.

Tuesday, September 15, 2009

banana raisin muffins

I have a confession to make. As I removed each piping hot tray of banana raisin muffins from the oven, I could not help but take deep breaths as I inhaled the aroma of the bananas. It was so addictive and I could not wait to take a bite of the muffins.

Without waiting for the muffins to cool down, Da and I sampled a muffin each. Oh my goodness.... it was "scrumptious"! The secret? Overripe bananas, ground cinnamon and ground allspice.

Ah.... now this has got you interested in baking the banana raisin muffins, hasn't it? This is a simple recipe and can be adapted easily to bake other types of muffins.

INGREDIENTS

4 large overripe bananas (mashed)
3/4 cup brown sugar
1 egg (beaten)
1/3 cup butter (softened)
1/2 cup raisins
1 tsp bicarbonate of soda
1 tsp baking powder
1/2 tsp salt
1 1/2 cups plain flour
1/2 tsp ground cinnamon
1/2 tsp ground allspice (or ground mixed spice)

METHOD

1. Preheat the oven to 175 degrees celsius.

2. Line the muffin pans with paper muffin cups.

3. Mix the bananas, brown sugar, egg, butter and raisins together in a large mixing bowl. Set aside.

4. Sift the bicarbonate of soda, baking powder, salt, plain flour, ground cinnamon and ground allspice in another bowl.

5. Fold the flour into the banana mixture. Mix until just combined. Do not over-stir.

6. Pour the batter into muffin cups (3/4 full).

7. Bake for 20 minutes or until the muffins are golden brown.

Blog Widget by LinkWithin